
Growing sugar snap peas and harvesting them from the garden is so rewarding! I love using them in salads and stir-fries so much that this year I have succession planted my sugar snap peas so I can harvest them for many months. One of the many benefits of growing your own vegetables is controlling the chemicals and pesticides used. And I value growing food without the nasties. So I want to share with you how to grow sugar snap peas, organically at home. Read on for the ultimate guide to growing sugar snap peas.
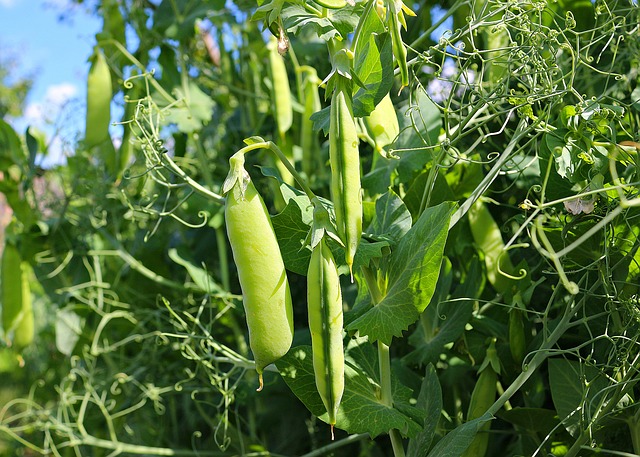
Table of Contents
- Growing Conditions For Sugar Snap Peas
- Sugar Snap Pea Varieties
- Growing Sugar Snap Peas From Seed
- How To Germinate Sugar Snap Peas
- Growing Sugar Snap Peas In Pots
- How To Plant Sugar Snap Peas
- Do Sugar Snap Peas Need To Climb?
- Sugar Snap Peas Trellis
- Growing Time for Sugar Snap Peas
- When To Harvest Sugar Snap Peas
- Storing Sugar Snap Peas
- Can You Eat Sugar Snap Peas Raw
- Common Pests And Disease
- Conclusion
- Recommended Products
Growing Conditions For Sugar Snap Peas
Sugar snap peas (botanical name Pisum sativum var. Macrocarpon) are a versatile vegetable to grow. And that’s because both the pod and the peas are eaten. Also, they are delicious eaten raw and equally delicious when they’re cooked.
They are an annual self-fertile vegetable, or rather, legume. And as part of the legume family, growing them helps put nitrogen back into the soil. So after the plant stops producing, dig the plant into the soil rather than pulling it out to help enrich the soil.
Climate for Growing Sugar Snap Peas
Sugar snap peas are a cool-weather vegetable. As a result, when to plant sugar snap peas will depend on your climate. The growing season for sugar snap peas is often early spring, after frost, and in autumn through winter depending on your climate.
The soil temperature should be at least 40°F (4°C) degrees and ideally under 80°F (27°C) degrees. You can use a soil thermometer to check the soil temperature.
Living in a warm climate you may be growing sugar snap peas in winter. And if you live in a cold climate, you might be growing sugar snap peas in summer.
Once planted, sugar snap peas can tolerate short dips in temperature below freezing and also light frosts.
Soil for Growing Sugar Snap Peas
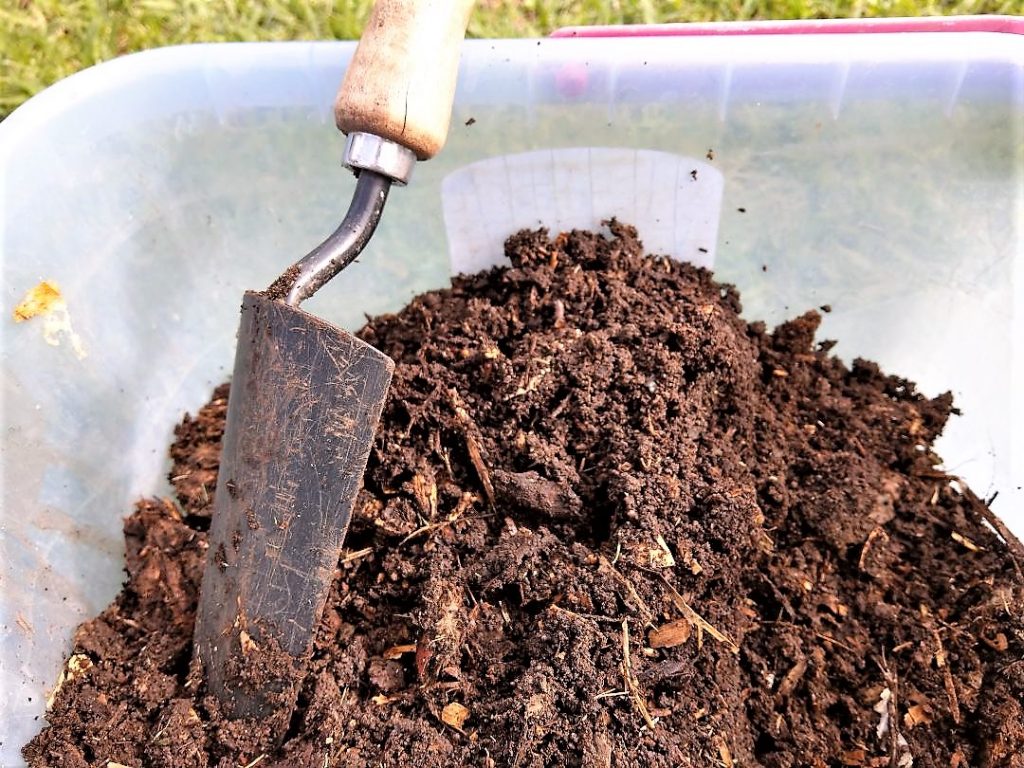
The ideal soil to grow sugar snap peas is free-draining and rich in organic matter. This can be achieved by adding compost and manure to the soil prior to planting. A pH of 6.0-7.5 is ideal for growing sugar snap peas.
Sun for Growing Sugar Snap Peas
Sunlight of 6-8 hours a day will provide the ideal light required for a healthy sugar snap pea plant. So plan to plant them in a sunny spot in your garden for a thriving harvest.
Water Requirments for Sugar Snap Peas
Water regularly for a great harvest of sugar snap peas. The soil should be lightly moist without being soggy. Sugar snap peas do not like dry soil.
You can test the soil with your finger by scratching the soil about an inch below the surface. If the soil feels dry, provide water and if it feels moist, no additional watering is required. You can also use a water gauge to monitor the soil moisture.
During periods of rain, additional watering may not be required.
Mulching with an organic mulch will help conserve moisture and protect the soil.
Fertilizer for Sugar Snap Peas
Besides amending the soil with compost and aged manure before planting, sugar snap pea plants do not require additional fertilization.
Although not essential, sugar snap pea plants can be given a liquid seaweed feed at the time of flowering to help support their growth.
Over-fertilizing sugar snap peas can reduce the plant’s harvest.
Compost and aged manure at the time of planting will provide all the feed the plant requires for the growing season.
Sugar Snap Pea Varieties
There are many varieties of sugar snap peas, here a few popular choices for home gardens:
Mammoth Melting – climbing variety with edible leaves and flowers
Oregon – bush type and bears heavily
Sugar Bon – a dwarf variety
Roi De Carouby – climbing variety producing purple flowers
Sugar Ann – a dwarf variety, can be susceptible to powdery mildew
Spanish Sky Scraper – productive and sweet-tasting
Growing Sugar Snap Peas From Seed
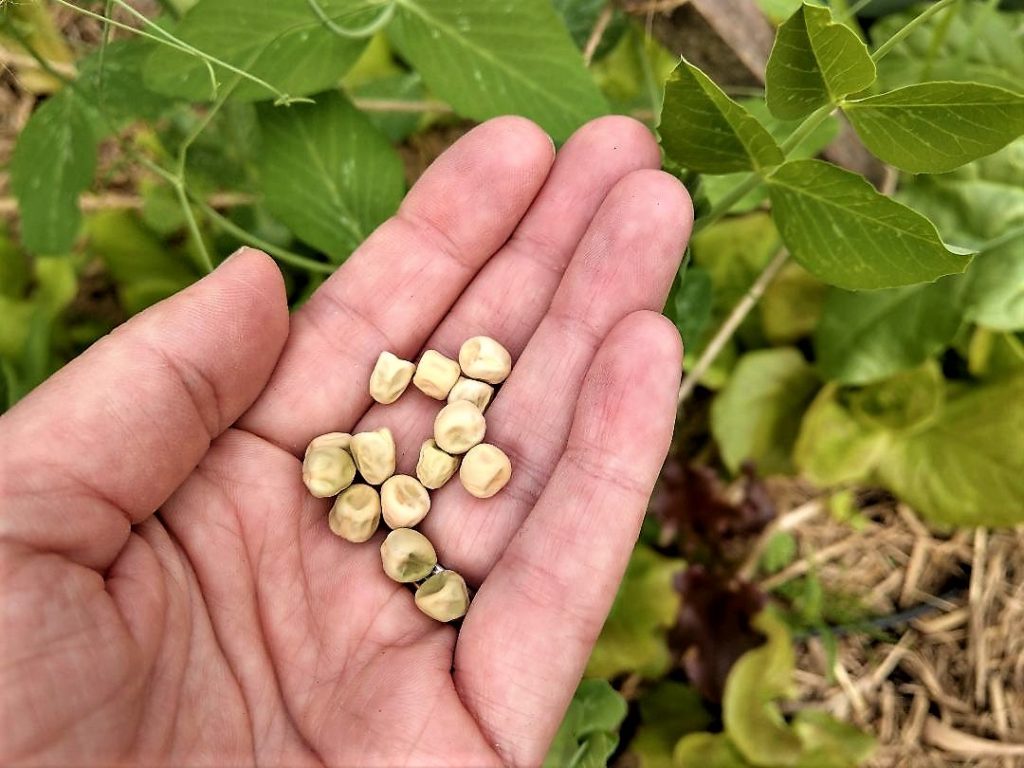
It’s easy to sow sugar snap pea seeds. Plant the seed directly into the ground or into seed raising pots.
Ideally, planting directly into the ground will mean less handling of the plant and therefore is the easier option. However, raising sugar snap peas in pots can protect them from pests who may be visiting your garden. Pests such as slugs, snails, birds or rodents, all really enjoy the taste of sugar snap pea seedlings.
How To Germinate Sugar Snap Peas
Plant the sugar snap pea seeds 1 inch (2.5cm) deep and about 4 inches (10cm) apart, directly into the ground. Water them really well initially which will start the germination process.
Then over the next 7-14 days, continue to carefully monitor the soil moisture to ensure the soil doesn’t dry out but also does not become soggy.
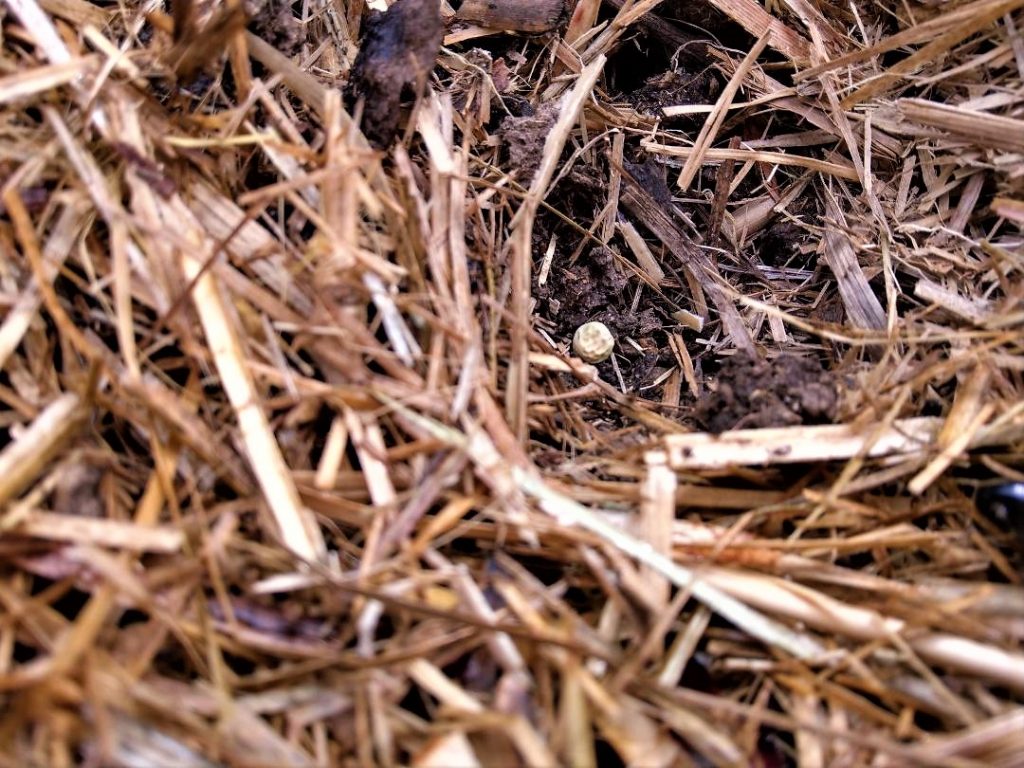
Seedlings will emerge in 7-14 days. The warmer the soil, the faster the seed will germinate.
Growing sugar snap peas in seed-raising pots (or these peat pots) is much the same as growing them in the ground. Using a quality seed-raising soil mix or your own homemade compost, sow the seed 1 inch (2.5cm) deep.
Water really well to help start the seed germination process and then the soil should remain lightly moist (but not soggy) until seedlings emerge.
When the seedlings are 4-6 inches (10-15cm) high, they can be transplanted into the garden or a large pot.
Growing Sugar Snap Peas In Pots
Sugar snap peas can be easily grown in pots or containers. Climbing varieties will require a support to climb, such as a garden stake, tomato cage, or trellis.
Pots need to be watered more often than ground-grown sugar snap peas as they dry out more quickly.
Keep the soil mulched with an organic mulch to help protect the soil from drying out and protect the plants.
How To Plant Sugar Snap Peas
Planting sugar snap pea seedlings purchased from a nursery or garden center starts with preparing the soil with rich organic matter of compost and well-rotted manure. Be sure to pick a position where the plants will receive adequate sunlight of 6-8 hours a day.
If you are planting a climbing variety of sugar snap pea, provide support for the plants to climb. Importantly, the climbing support should be in place prior to planting to avoid damaging the sugar snap peas delicate roots later. You might like to check out our DIY Trellis here.
Next, dig a small hole, large enough for the sugar snap pea seedling and plant them up to the same level they were in their pot, close to the climbing support. Gently firm the soil around the seedling and water well at the base of the plant to help settle the soil around the plant roots.
Sugar snap peas can be planted 1.5 inches (4cm) apart with row spacing of 15-24 inches (40-60cm) apart.
Mulching around the plant, being careful not to directly touch the stem, to help protect the soil from drying out as well as suppress unwanted weeds.
Do Sugar Snap Peas Need To Climb?
Yes, the majority of sugar snap peas need to climb so they aren’t damaged on the ground. Though there are, for example, bush varieties of sugar snap peas that do not climb far.
Climbing varieties of sugar snap peas can reach 6-8 feet (1.8-2.5 meters) high while bush varieties can grow up to 3 feet (90 cm) high and compact varieties can be smaller still and do not require a support to climb.
For the majority of sugar snap peas, you will need to provide them with support in the form of garden stakes, bamboo, or garden stakes tied into a teepee shape and woven with twine, covered in wire mesh or trellis netting, a tomato cage, or trellis.
For multiple sugar snap pea plants, a trellis is the best support. This might take the form of a bamboo teepee trellis or something much larger.
Sugar Snap Peas Trellis
Growing sugar snap peas on a trellis will provide the plant with the ideal growing support.
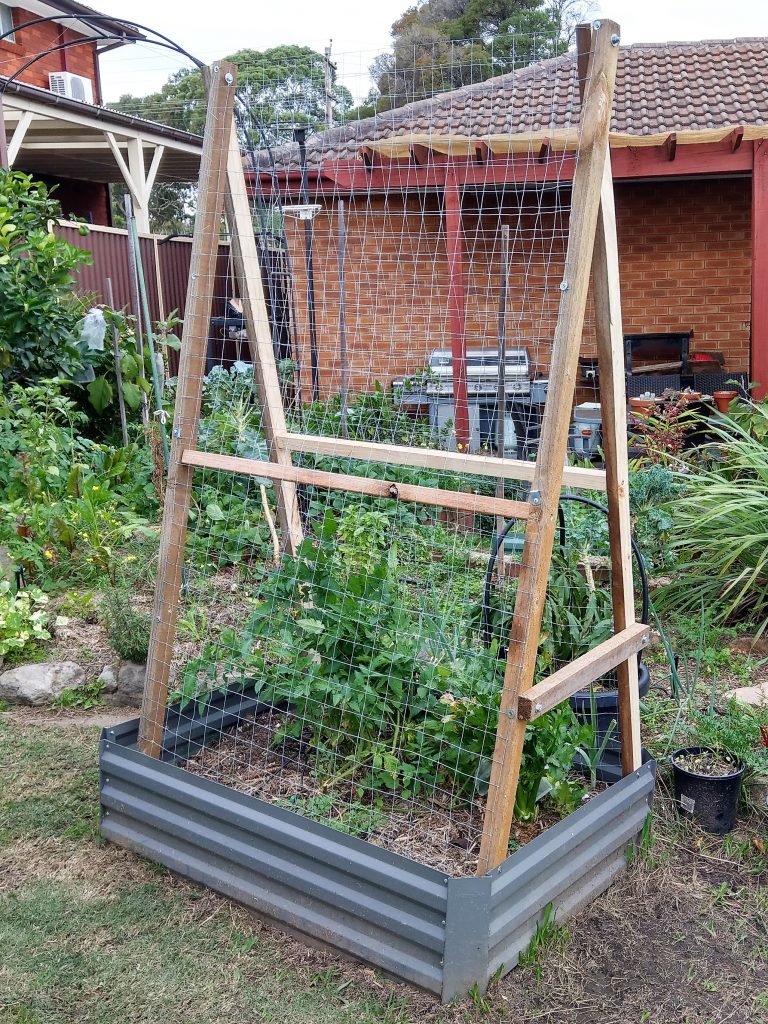
You can purchase a trellis or you can make one as I’ve done in the photo above. (Ok, I assisted in making this DIY trellis). We made this trellis with left-over building material originally purchased to build our backyard chicken enclosure.
Reusing or recycling building materials is great for the environment and for working towards a sustainable garden. And it’s fun to think up ways to reuse what you already have in the garden.
Growing Time for Sugar Snap Peas
The time it takes sugar snap peas to grow and start producing is 8-12 weeks. In addition, the length of time to maturity will also depend on the growing conditions provided.
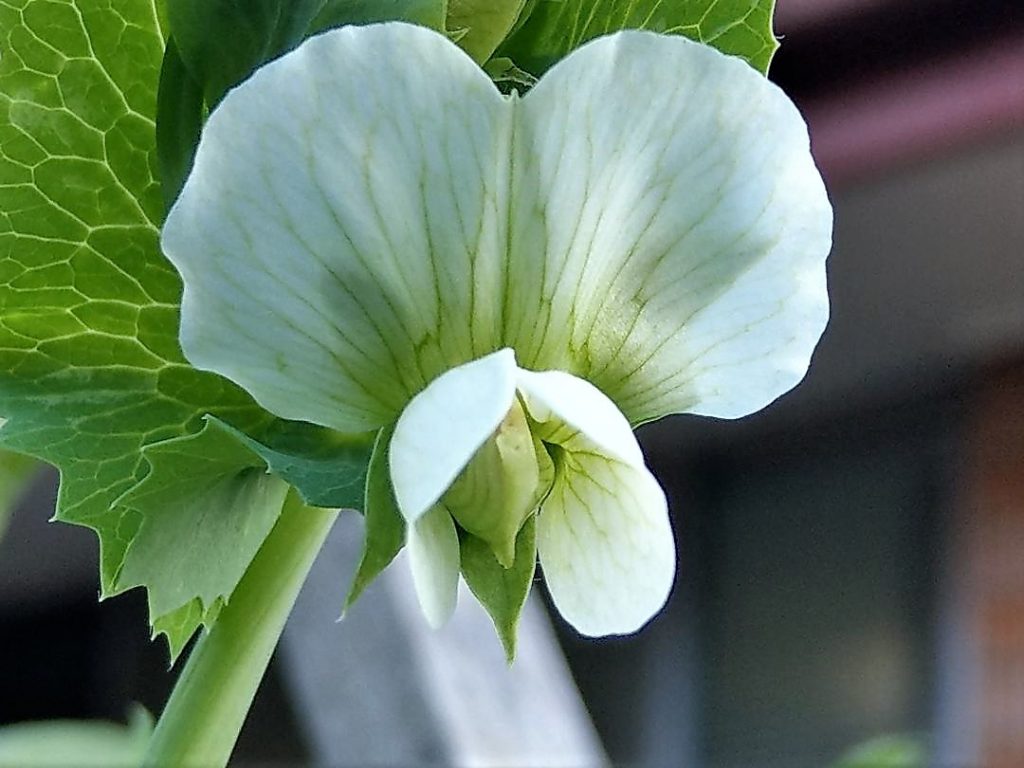
Sugar snap pea plants flower and then form their pod with tiny peas. The peas fill out the pods and the pods grow larger.
For an extended harvest of sugar snap peas, try succession planting. This is the process of planting additional crops in the same season. For example, this year I have planted three crops, spaced 2-3 weeks apart, so I can harvest sugar snap peas for many months.
When To Harvest Sugar Snap Peas
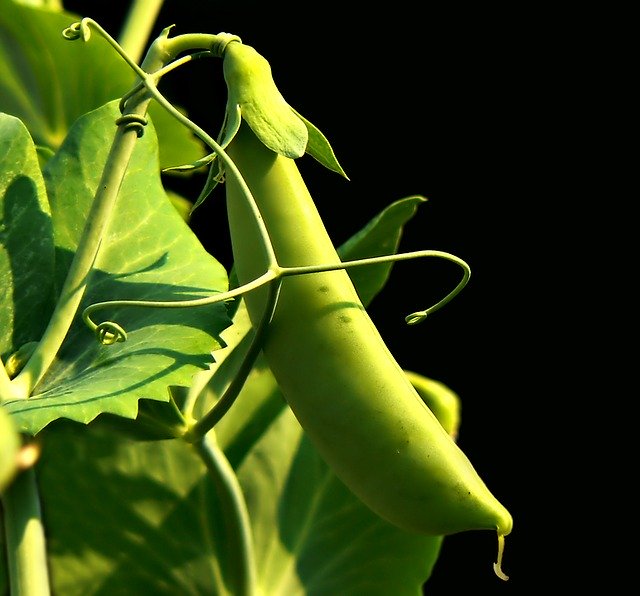
Sugar snap pea pods will fill out with maturing peas and become plump-looking. When this occurs, they are ready for harvesting.
If sugar snap peas are left to grow on the plant for an extended time, they will become stringy and tough to eat. Therefore, harvest them on the younger side for delicious tasting sugar snap peas. And regular harvesting will encourage the plant to produce more.
To harvest sugar snap peas, simply use garden clippers or scissors to clip the pod off the stem just above the pod.
One sugar snap pea plant can yield 1/4-1/2 lb (115-230g) over the growing period.
Storing Sugar Snap Peas
Sugar snap peas are at their very best when freshly harvested. The sugars start to reduce along with the crispness, over time. But they can, of course, be stored after harvesting.
Storing Sugar Snap Peas in the Fridge
For storing sugar snap peas in the fridge, wrap them, unwashed, in a plastic bag and store in the crisper. They will last 3-5 days.
Freeze Sugar Snap Peas
To freeze sugar snap peas, prepare them by washing them well, trim off the stem end of the sugar snap pea and remove the string (optional). Then blanch them in hot water for 1-2 minutes before plunging them into a bowl of ice water (ice bath) for 2 minutes to stop the cooking process.
After the peas are dry, seal them in serving-size portions in plastic bags, label them and freeze. Or you can freeze them on lined trays for a few hours before placing them in plastic bags, so they won’t stick together. They will last 8-12 months.
Without blanching, frozen sugar snap peas should be used within 4-6 weeks.
Can You Eat Sugar Snap Peas Raw
Yes, you can eat sugar snap peas raw – they are delicious! You can eat both the pod and peas whole or they can be peeled for eating just the peas.
You can also eat the young shoots and tendrils which look beautiful in salads. They can be eaten both raw or cooked.
Sugar snap peas can also be stir-fried, sauteed, steamed, canned and frozen.
Common Pests And Disease
There are a number of pests and disease that can affect sugar snap pea plants. Be assured that in the right growing conditions, these will be minimized. Also, encouraging beneficial insects into your garden can help keep pests in check for you. They include, among others, hoverflies, parasitic wasps, ladybirds and many spiders. Nonetheless, here are some pests and disease to look out for:
Disease
Asocochyta blight – fungus infection that often looks like blackened stems, yellow leaves with brown patches and dropping of buds. Control by removing infected plants, use crop rotation and disease-resistant seed.
Bacterial blight – similar to above. Foliage appears to have watermarks which turn brown and papery, becoming translucent. To help prevent this, water at the base of the plant, practice crop rotation and again use disease resistant seed.
Root rot – leaves turn yellow, wilt or die off. To prevent root rot, ensure soil is free draining and plants are not over-watered.
Dampening off – similar to root rot.
Powdery mildew – a fungal infection that looks like white or gray powder affecting the foliage, flowers and stems. Try your own natural fungicide with this powdery mildew milk spray.
Downy mildew – often looks like a fuzzy growth on the plant. Caused by too much moisture. Ensure adequate airflow between plants. Water at the base of the plants, ensuring plants are in free-draining soil so they don’t breed disease.
Fusarium wilt – foliage will yellow and wilt. Most plants will eventually die. Prevent the disease with crop rotation and disease-free seed.
Pests
Aphids – sap-sucking small soft-bodied insects on the underside of leaves and/or stems of the plant. Control with horticultural neem oil.
Pea Weevils – they are small brownish to black insects with a white zigzag stripe along its back. Their larvae can feed on the forming peas and the adults on pea blossoms. To control, keep garden clean of debris, as they overwinter. Infected vines once finished should be destroyed so as not to continue the breeding cycle.
Cutworms – cutworms (larvae of moth) hide in the soil during the day at the plant’s base or in its debris. They are up to 1 inch (2.5 cm) in length with a wide range of colors and patterns. Cutworms will curl up into a C-shape when disturbed.
To get rid of them, maintenance of the garden area is important. Clean out plant debris, then to control them naturally and organically, spread diatomaceous earth around the base of the plant.
Cutworms sleep during the day and become active at night, so you can also visit the garden during this time and hand pluck the larvae from the plant.
Armyworms – a green caterpillar with worm-like movements, they often fed in groups on the leaves of plants. Control young armyworms with horticultural neem oil. Older armyworms may need to be hand-plucked off the plant.
Cucumber beetles – small beetles that will chew through foliage and flowers. Control with horticulture neem oil.
Thrips – Tiny insects but still visible to the eye. If the leaves are infested with a high thrips population, the leaves will curl and distort.
Control with horticultural soap or neem oil handy.
Spider mites– These tiny sucking pests that can quickly damage your garden. Damaged leaves will show webbings and tiny spots, which will then change color and fall off.
Try spraying plants with a strong jet of water to reduce the spider mite population. Make sure the plants are adequately watered.
Diatomaceous earth or horticultural neem oil are good solutions to eliminate spider mites.
Nematodes – microscopic and worm-like in appearance. Nematodes feed off the plant roots so it’s difficult to determine if your plant is affected by them without digging them up. Eventfully the foliage wilts and by then it’s too late for the plant.
Leaf miners – they create a trail-like pattern on the leaves. Mature plants can more easily manage attack by leaf miners, so protect seedlings with a ventilated cover. Control with neem oil.
Conclusion
Nothing beats the taste of your own home-grown sugar snap peas harvested fresh from the vine. And growing sugar snap peas is both easy and rewarding. So why not start a crop of your own sugar snap peas today? And you too can be experiencing delicious sweet sugar snap peas!
Recommended Products
- Soil Thermometer
- Water Gauge
- Seaweed Fertilizer
- Organic Seed Raising Potting Mix
- Seed Starter Peat Pots – start seed easily in these peat pots.
- Glass Spray Bottle – gently water seedlings with a water spray bottle.
- Tomato Cage – give sugar snap pea plants something to climb.
- Trellis – provide support for sugar snap peas to climb.
- Trellis Net – make your own trellis and use netting to help the plant climb.
Would you like to grow more edible plants in your garden at home? Click here:
- How To Grow Swiss Chard
- How To Grow Delicious Lettuce – Fast Growing Vegetable
- Growing Beans: Planting, Caring for, and Harvesting Beans
- 7 Reasons Why Your Green Bean Plants Are Turning Yellow
- Bean Plants Dying? 7 Causes and Solutions
- How to Grow Beets: Planting, Growing and Harvesting Beetroot
- How to Grow Radishes: the Easiest Vegetable to Grow
Aside from spring, most gardeners, regardless of where in the country they live (colder or warmer), get to plant a second round of these crops in the fall. Specifically, the perfect time to plant snap peas is in late summer, at least 8-10 weeks before the first frost in your region.