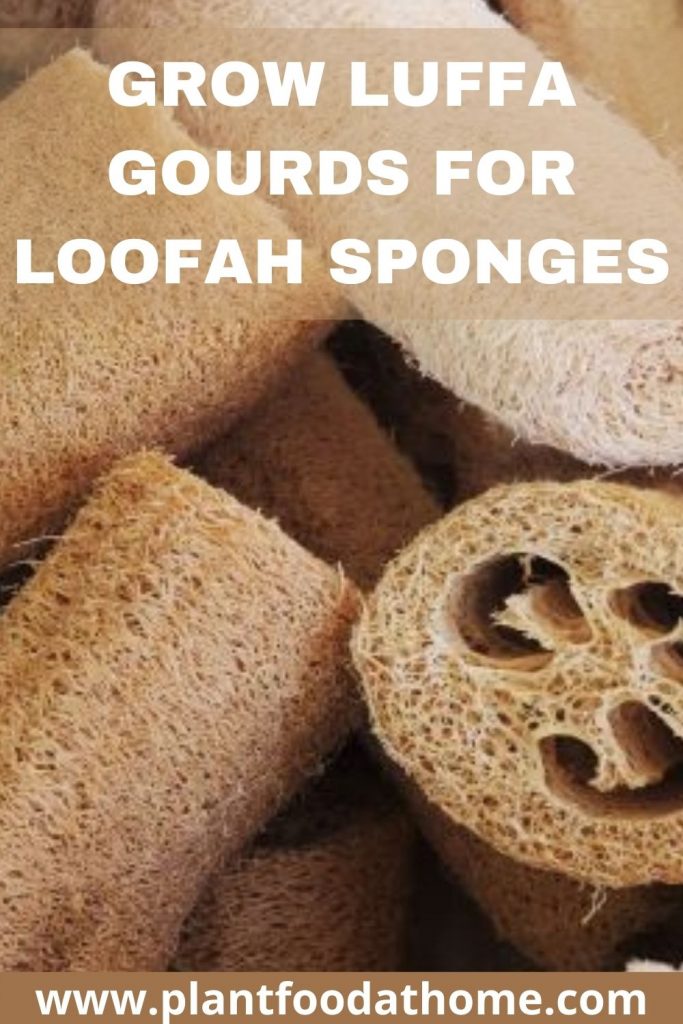
You’ve probably seen a loofah sponge in the store, or maybe you even have one in your shower right now. But do you know how loofah sponges are made? Many people are surprised to learn that loofah sponges grow on vines! Let’s take a look at the quirky luffa gourd and see how you can grow your own luffa and turn them into your own sponge!
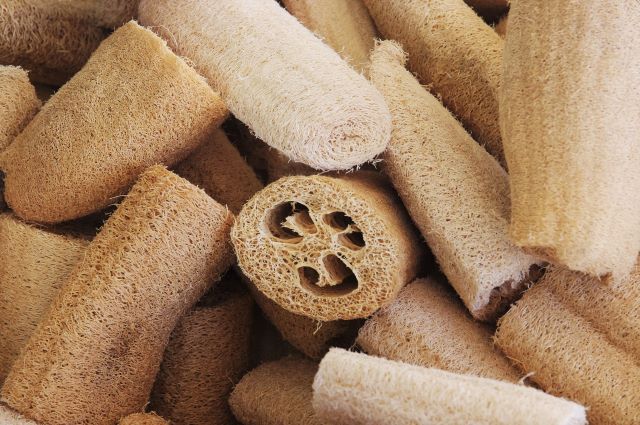
Table of Contents
- Luffa Plant Profile
- Ideal Growing Conditions for Luffa
- Planting Luffa Gourds
- Luffa Gourd Pollination
- Harvesting Luffa
- Processing Luffa Gourds for Loofah Sponges
- How to Keep Your Loofah Sponge Clean
- What Does a Luffa Gourd Taste Like and How Do You Eat Luffa?
- Pests & Diseases
- In Conclusion
- Some Favorite Gardening Products
Luffa Plant Profile
The Luffa aegyptiaca, otherwise known as loofah, luffa, or sponge gourd, is an annual member of the cucumber family. Native to locations such as India, China, and Vietnam, the luffa prefers to grow in warm climates (around USDA zones 6 and up).
The luffa vines can grow up to a whopping 30 feet (10.5 meters) long, and produce gourds that reach a length of about 2 feet (60cm) long! Needless to say, that’s a whole lot of sponges. Luffa vines are slow-growing; it can take up to 200 days for the plant to reach maturity. However, the gourd itself grows very quickly; about an inch and a half per day.
Luffa is used both as an edible plant and for the production of loofah sponges, something we’re all familiar with. When picked young, the luffa can be a delicious meal, as its tough fibrous insides have not developed at that stage. At their most mature, the loofah is anything but delicious; its insides form a tough cluster of fibers that make up the iconic loofah sponge we know and love.
Ideal Growing Conditions for Luffa
Climate for Growing Luffa
Since the luffa is native to the hot climates of South Asia, it is no surprise that the gourds prefer to grow in warm temperatures. An ideal air temperature for growing luffa is about 85°F (29°C), though a range between 75°-90°F (24-32°C) would also produce thriving luffa plants.
Soil for Growing Luffa
Luffa gourds love rich, fertile soil. Prior to planting, I would highly recommend working in some organic compost and aged manure to your soil to give your luffas the nourishment they need to provide a bountiful harvest. Luffas also prefer warm soil, about 70°F (21°C). An optimal pH level for luffas would be around 6.0 to 6.5, slightly alkaline.
Sun Requirements for Luffa
Luffas absolutely require a full day’s worth of sunlight. A full day’s worth of light constitutes at least 8 hours a day. A lack of sunlight may result in no luffa gourds developing.
Water Requirements for Luffa
Your luffa plants should be well-watered, but not completely saturated with water. Regardless, I would not allow the soil to dry out completely. Definitely monitor the soil and if it begins to dry, water your plants. Try to water directly on the soil, never on the vines themselves.
Fertilizer for Growing Luffa Gourds
In the beginning stages of growing your luffa gourds, it is best to use a fertilizer that is heavy with nitrogen for your luffa gourds. This is because nitrogen encourages the growth of vines and foliage. Organic compost and aged manure contain high levels of nitrogen and are perfectly mixed in the soil. After transplanting to their permanent location, you can use an all-purpose fertilizer with an equal NPK ratio like this organic fertilizer here.
Growing Luffa Gourds From Seed
Luffas have a significantly long growing season; somewhere between 150 to 200 days. If you live in a cooler climate, it would be beneficial to start your loofah seeds indoors about 5 to 6 weeks prior to your last anticipated frost date.
The luffa seeds you use to plant should be newer seeds; preferably from the prior growing season. You can soak your seeds for 24 hours in water before planting to assist in germination but it’s not necessary if you prefer to skip right onto sowing your seed.
The likelihood your luffa seeds will germinate can be increased by using a heating mat for your seeds. You should plant your luffa seeds in their planters and then place the planters on top of the mat. Seed germination could take up to 14 days.
Luffa plants are prone to transplant shock, which you should look out for. One way to mitigate transplant shock includes transplanting your luffa in a biodegradable pot.
When the soil and air reach the right temperature, and all threats of frost are gone, you can start hardening off your luffa seedlings. Every day for about one week, you can expose your luffa to more direct sunlight and outside conditions until it is strong enough to withstand a full day’s worth of sunlight. You can read more in our article: Hardening Off Seedlings (and avoiding transplant shock).
Planting Luffa Gourds
You can transplant your seedlings to their final location when the temperature has warmed up. Planting them near a strong trellis is ideal. Remember, these plants love to climb and the vines will be very long. Space each plant at least 8 to 12 inches (20-30cm) apart from one another.
Two months prior to your anticipated first frost, it’s a good idea to clip all remaining flowers from your vines (don’t worry these flowers are edible, so don’t feel like you’re wasting them). This will allow your plant to focus the entirety of its energy on developing the existing luffa gourds.
By the end of the growing season, you should have big luffas. Make sure to pick them before the frost comes in. For loofah sponges, it’s best to harvest the gourds when they turn brown on the vine. However, for some people living in cooler climates, that might be unrealistic. If your luffas are still green by the time the frost comes, you can still pick your luffas. You will, however, have a more difficult time turning them into sponges.
Luffa Gourd Pollination
Luffa vines produce both female and male flowers and they are pollinated by insects such as bees.
If you have other flowering plants nearby, your luffa flowers will benefit by way of beneficial insects coming into your garden and pollinating them.
However, you hand pollinate the luffa flowers and increase your harvest. Here’s how.
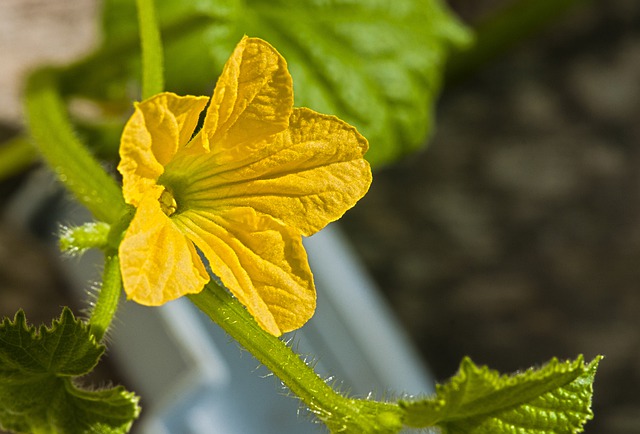
Female flowers grow with an immature fruit at the base while the male flowers grow on a thin, long stem. Using a small paintbrush or q-tip, gently brush inside the male flower then inside the female flower.
Another really simple method is to pick off a male flower, remove the petals and gently brush the male flower pollen inside the female flower.
This process will transfer the pollen from male to female flowers for successful pollination and a bigger harvest of luffa gourds.
Harvesting Luffa
Depending on what you intend on using your luffa gourds for, the harvest time will vary. For example, would you like to eat luffa gourds or grow them for sponges?
Harvesting Luffa Gourds for Eating
The key to a delicious edible luffa gourd is picking them when they’re young at around 2.5-4.5 inches (6-12cm) in length. They should feel firm to the touch and the skin should be unblemished with a velvety feel.
Harvesting Luffa Gourds for Loofah Sponges
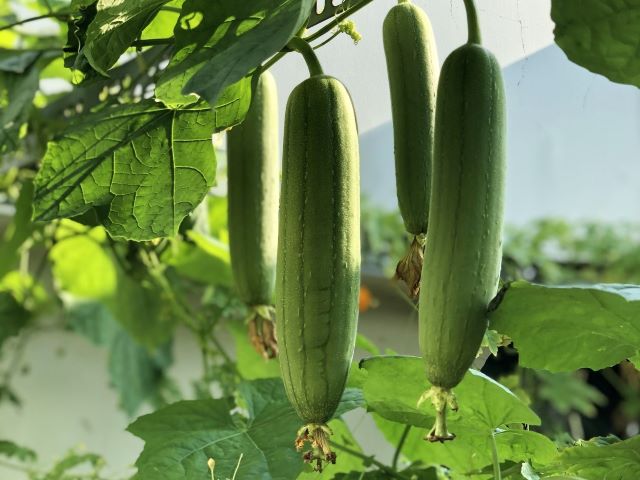
A luffa gourd that is grown for sponges will feel and look entirely different. A fully mature luffa will have rough, hard skin. Luffa gourds that have fully matured can reach a length of up to 2 feet long.
The luffa in the photo below was growing over a shed roof and it is well and truly ready for harvesting for loofa sponges.

Processing Luffa Gourds for Loofah Sponges
The first luffas that grow on the vine should be left to mature for sponges, this will give them the time needed to fully develop. You will notice your luffa is ready to be picked when the skin has turned from green to a deep yellow or brown color. At this stage, the skin starts to separate itself from the inner fibers and the gourd itself feels lightweight.
As mentioned previously, if you live in a cooler climate (say zone 6), and your luffas are still green just before the first frost, harvest your luffas anyways. You will have to put in more effort to prepare your luffa for sponges. But, it’s significantly better than accidentally losing all your progress due to a frost.
For the best quality of sponge, try to leave your luffa gourd on the vine for as long as possible. Doing so allows for maximum fiber development. However, you should pick your dried luffa before any frost comes in. If you have any luffas that didn’t mature enough to make a proper sponge they can be composted.
After you’ve removed your luffa from the vine, the first step is removing its tough outer skin. Sometimes, the skin has already cracked from drying out on the vine, which makes the job a little easier. Otherwise, gently squeezing the fruit will be enough to make a few cracks for you to peel off the skin.
Alternatively, you can also try soaking your dried luffa gourd in water for a few minutes for easier removal. After the skin has been fully shed, shake out the seeds (and save them for next year). Some people find it easier to just remove the top end of the skin and then gently tap out the seeds before removing the remaining skin.
Your next step will be washing out the excess sap. This can be washed off by hosing your luffa with water. Alternatively, a bucket with a touch of dishwashing liquid will also wash away the sap.
If you find your dried luffa has some dark spots on it and you’d like a more uniform color, dabbing your sponge with some non-chlorine laundry bleach will get you there. You can dip a q-tip in the bleach and gently dab until it’s the color you prefer. Afterward, rinsing off the loofah under the sink will wash off any excess bleach.
Alternatively, you can soak the loofah in a bleach solution (1 part bleach, 10 parts water). This can help even out the color.
Your final step will be drying out the loofah. The easiest method is drying them out in the sun. Turn over your sponges frequently until they are adequately dry.
How to Keep Your Loofah Sponge Clean
After the loofah sponges have dried, they can be stored in a cloth bag. Doing so prevents dust from getting onto your sponge. You can keep your loofahs for many years with proper storage.
I know you’ll fall in love with using your new sponge whenever it’s time to hit the showers. But keeping your loofah clean is just as important too, especially after you’ve used it a few times. Luckily, loofah sponges are very easy to keep clean in between uses.
It’s recommended that you dry out your loofah sponge entirely before reusing it again for cleaning yourself. In addition, replacing your loofah sponge after every three or four weeks will mitigate the spread of bacteria.
A diluted bleach soak can help extend the shelf life of your loofah sponge as well. The bleach is highly effective in preventing nasty bacteria from growing in the little crevices of your loofah sponge. A solution of 1 part bleach and 10 parts water will do the trick.
What Does a Luffa Gourd Taste Like and How Do You Eat Luffa?
Being a member of the cucumber family, the luffa is noted for having a crisp texture. When cooked, the taste is described as being mild and somewhat sweet, similar to zucchini or squash.
Young luffa gourds as well as their flowers are perfectly edible and are used in many dishes where luffa hails from. An edible luffa should be picked when they are small, 2.5-4.5 inches (6-12cm) in length. Their skin will also feel soft, making it easy to bite into.
Some chefs praise the luffa for its ability to soak up liquid (hence the name sponge gourd). If you plan on cooking your luffa gourd, think about cooking them in soups, stews, or a marinade so it can really absorb the flavors. Another popular way to cook luffa is to stir-fry them.
If you’re looking for luffa gourd recipes to try, here are a few recipes to get you started:
My Thai: Stir-Fried Luffa Gourds with Eggs – from Serious Eats
Vietnamese Luffa Gourd Soup with Ground Port – from Vicky Pham
Sauteed Ridge Gourd – from Masala Herb
Pests & Diseases
Pests and diseases will pose a bigger problem in your luffa plant’s early stages; when it is too young to defend itself against any natural foes. As the luffa matures, it becomes stronger and is able to withstand small inconveniences such as slugs or mildew. Resistance to most diseases and pests is one of the luffa gourd’s more positive attributes.
Regardless, let’s look at a small list of possible contenders against your young luffa:
Slugs
A slimy little creepy-crawly we all know and can identify easily. Slugs can pose a threat to young luffa plants as they like to snack on the foliage of your plants. Slugs are an easy pest to deter, however. My preference is to protect your young plant with a covering of netting. Netting does not introduce any harmful pesticides and can easily be applied and removed as needed. You can use this to protect your vines while they’re still young, and take it off when they’re mature enough to grow without protection.
Powdery Mildew
Powdery mildew comes in the form of white speckles on the leaves of your plant, looking like what appears to be powder. While powdery mildew is a very small issue for fully grown luffa vines, it can still happen to your plant. The luffa vines may not be phased, but mildew has the potential to spread to other plants in the garden, where it may be more of a problem. You can prevent the onset of mildew by trying to water as close to the ground as possible. If your plants already have a case of powdery mildew, using a milk spray can get rid of it.
In Conclusion
Luffa gourds are one of the most interesting crops I’ve come across. Growing your own loofah sponges is also very rewarding. Loofah sponges make excellent gifts for friends and family and they’ll be amazed to know you grew them in your own garden!
Some Favorite Gardening Products
- AeroGarden Bounty Indoor Hydroponic Herb Garden
- Felco Garden Pruners
- King Bird Raised Garden Bed
- Sloggers Waterproof Garden Gum Boots
- Horticultural Neem Oil
Further reading:
- Growing Zucchini: Planting, Caring, And Harvesting Zucchini
- How to Grow Cucumbers: Planting, Growing and Harvesting
- Growing Pumpkins Successfully At Home
- Growing Cucamelons: Planting, Caring and Harvesting Cucamelon
- Kiwano Melon: Grow African Horned Melon and Eat the Fruit
- Watermelon Plant Dying? Causes and Solutions