
A DIY trellis for cucumbers in the vegetable garden makes great use of space by allowing you to grow vegetables vertically. And climbing vegetable plants, including cucumbers, need the support of a trellis to help protect their crops. I particularly wanted a DIY cucumber trellis for growing cucumbers that could later be used to grow sugar snap peas and beans.
So here are the instructions for making this DIY trellis for cucumbers.
My husband and I used left-over building materials for this project. These materials were originally purchased to build our backyard chicken enclosure. But you can use whatever materials you have or you can purchase building materials from your local hardware store.
But if you do have leftover building materials or are able to source them from a friend or neighbor, you’ll save money and contribute to a more sustainable garden. So be on the lookout for materials you can reuse and repurpose into a garden trellis.
How To Make A DIY Trellis For Cucumbers
Tools:
- Tape Measure
- Pencil
- Circular Saw – we used a circular saw to cut left-over building material to the preferred width and length. Instead, you could purchase lengths of wood already cut to size.
- Drill with screwdriver bit- we used this to create the basic frame as well as screw on the wire mesh.
- Wire cutters – wire cutters were used to cut the wire mesh to size.
- Spanners – to do up the bolts
- Bolts and screws – the screws were for the wire mesh and the bolts were used to join the lengths of wood that form the trellis frame.
Materials for DIY Trellis:
- Lengths of treated pine or structural timber for outdoor use.
– 4 X lengths of 74″ (188 cm) x 2″ (5 cm) x 1.5″ (38 mm)
– 2 X lengths of 41″ (204 cm) x 1 3/8″ (35 mm) x 1 3/8″ (35 mm)
– 1 X length of 21 1/2″ (55 cm) x 1 3/8″ (35 mm) x 1 3/8″ (35 mm) - Wire Mesh or Aviary Wire – 2 panels of 71″ (180 cm) x 42″ (107 cm)
- Fencing Fixing Clips – about 20
- Screws for the fencing clips
- Nuts and Bolts washers – 4 bolts (3 3/4″ x 1/4″ / 95 mm x 8 mm), 8 washers (1″ OD x 1/4″ ID / 25 mm x 8 mm) , 4 nuts to suit bolts
- Large screws – 4 x 2″ (5cm)
Method:
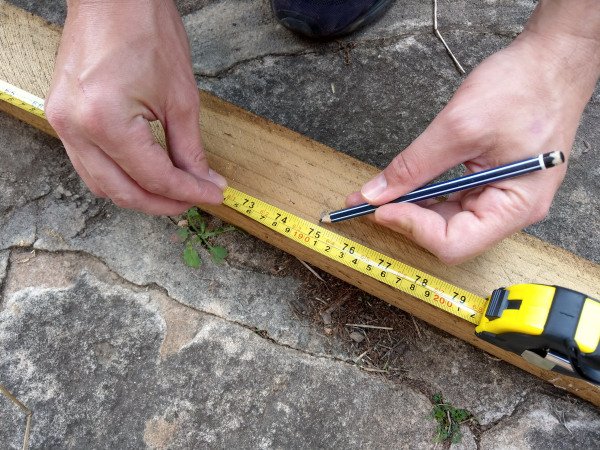
Step 1: Measure the timber
Firstly, measure the length of the wood and mark where to make your cuts. These will be the uprights for the main frame. They’ll be about 74″ or 188cm. You can make it whatever length works for you though.
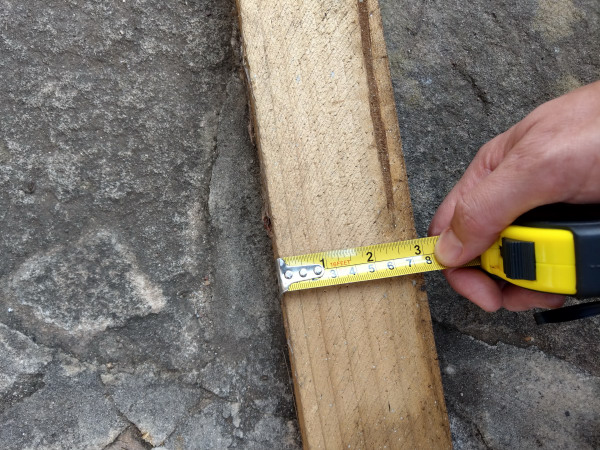
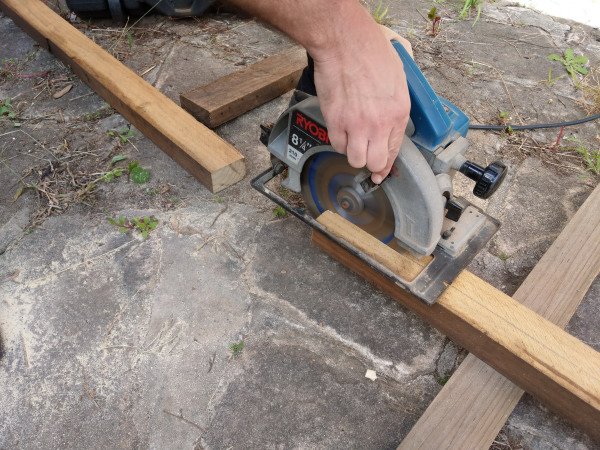
The leftover timber we used was too thick (3″ / 75mm). So we decided to rip it in half using the circular saw (cut it down the middle lengthways) to make it 1.5″ or 38mm thick.
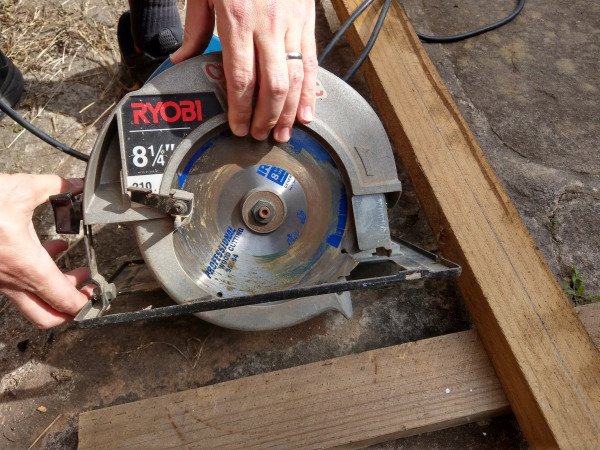
Step 2: Cut the timber to length
Next cut the lengths of wood to size. We used a circular saw for this job, though you may have purchased your wood already cut to size, in which case, move to the next step.
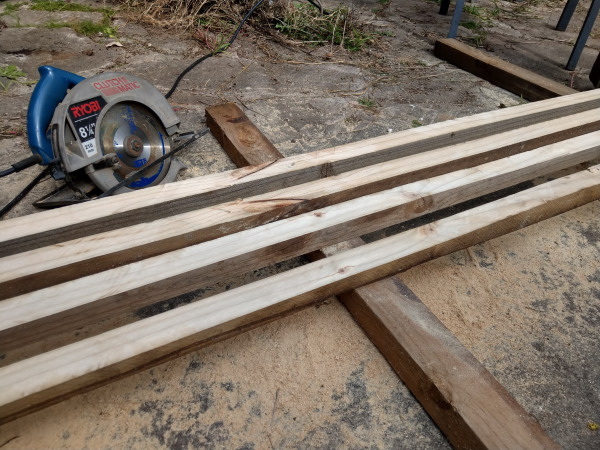
You’ll need to cut the timber so you end up with:
- 4 X 74″ (188 cm) x 2″ (5 cm) x 1.5″ (38 mm) – these will be the uprights
- 1 X 21 1/2″ (55 cm) x 1 3/8″ (35 mm) x 1 3/8″ (35 mm) – this will be the side brace
- 2 X – 41″ (204 cm) x 1 3/8″ (35 mm) x 1 3/8″ (35 mm) – these will join the two “As” together *
* You can make these longer or shorter depending on the space you have. You’ll need to adjust the wire panels to suit though.
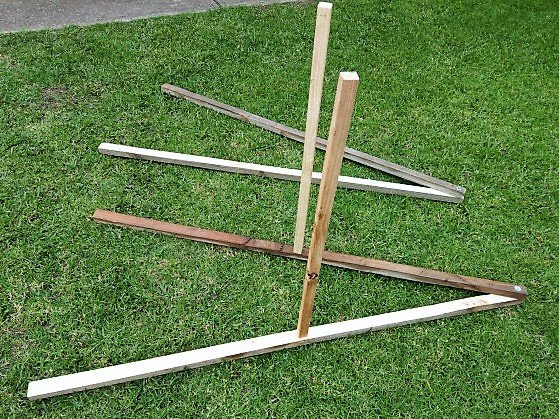
Step 3: Bolt the “A’s” together
Now it’s time to join the 74″ (188 cm) lengths together to make the upright “A”.
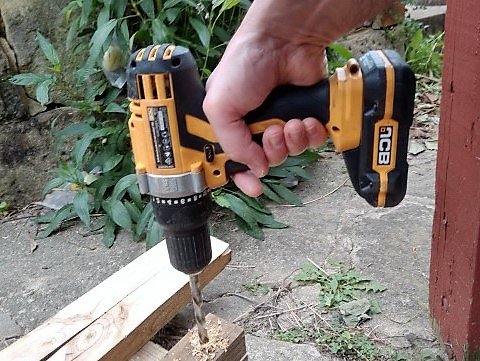
Take two of the lengths and drill a hole through both of them. It should be about 1″ or 25mm from the end of the timber.
Make the hole slightly larger than your bolt. If you’re using our suggested size, make the hole about 5/8″ (16 mm).
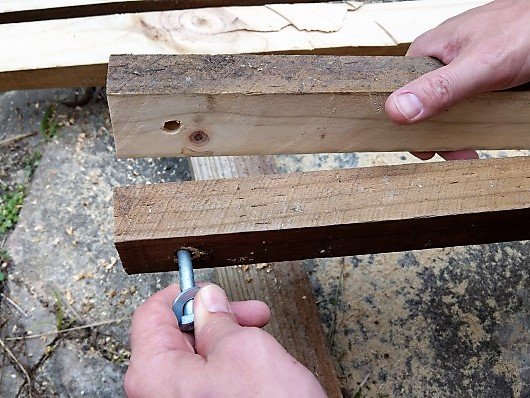
Then push the bolt through both pieces of timber using a washing between the head of the bolt and another next to the nut.
Repeat for the other two lengths of timber. You now have two hinged “A’s”.
Step 4: Screw the joiners to one of the A-frames
It’s time to put the joiners on. These will join the two “A’s” together. You’ll be using the two 41″ (204 cm) lengths of timber to do this. Remember, you can make these as long or short as you like. It depends on your space.
This step is a little tricky and you may need someone to help you.
Measure the halfway point of your upright “A” and mark it. Drill a pilot hole through it. It should be smaller than the diameter of the 2″ (5cm) screws.
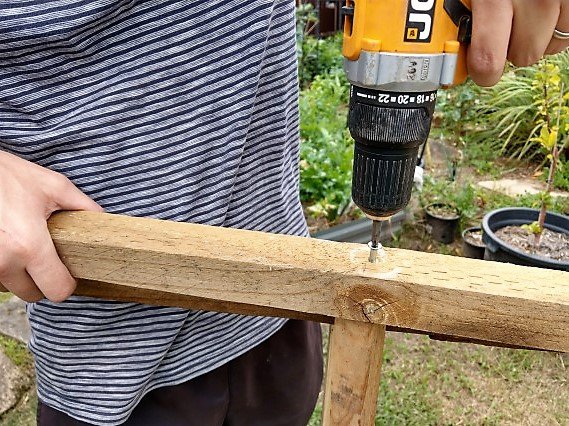
A pilot hole is a small hole that is drilled before using a screw. It makes it easier to do the screw up and prevents the timber from splitting. It should be a slightly smaller diameter than the thickness of your screw.
Drill a pilot hole into the end of the brace too. Using the, 2″ (5cm) screws, you can screw the joiner onto the “A” frame. You may need someone to help hold one of the pieces.
Repeat this step for the other side of the “A” frame. One of the “A” frames should now have two braces screwed onto it whilst the other does not have any braces on it yet.
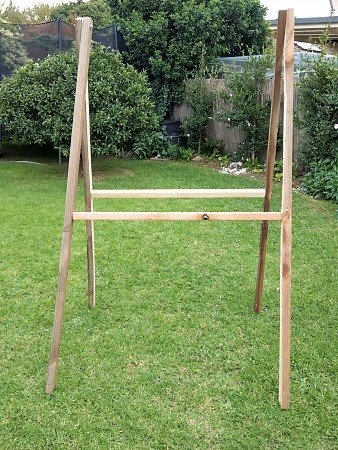
Step 5: Fix the other “A” to the joiners
Now to drill the holes in the other “A” frame.
Measure the center of the “A” frame, the one without the braces screwed on it, and drill another pilot hole in each upright.
Here’s where it gets tricky. With the help of a friend, stand both “A” frames up and screw the “A” without the braces attached already, to the braces so it ends up like the picture below.
Step 6: Add the mesh
Collapse and lay your frame down on the ground. Lay the mesh over the top and line it up so it’s nice and straight. Don’t put the mesh all the way to the bottom, you want to leave a little room (about 6 inches or 12 cm) so the wire won’t end up touching the ground.
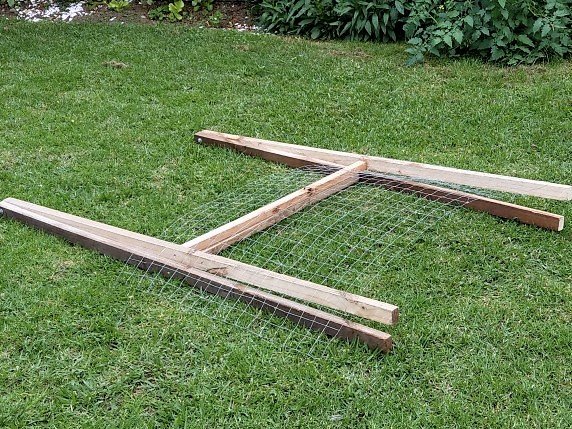
Using the fencing clips, screw the mesh on. You can also use regular screws and washers instead of fencing clips. Space them about 15″ or 38 cm apart.
The mesh we had wasn’t tall enough to cover the whole frame so we had to do two rows of mesh.
After you’ve fixed the mesh onto one side, trim off the excess with wire cutters.
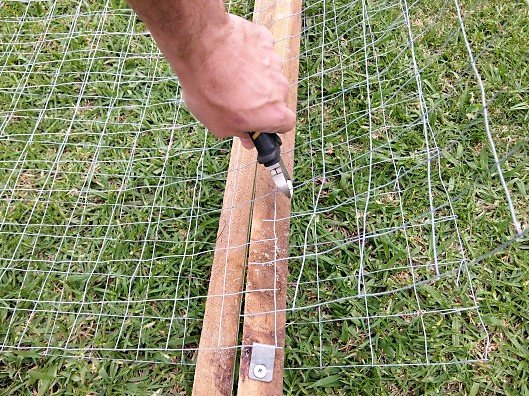
Repeat the whole mesh fixing procedure on the other side of the frame.
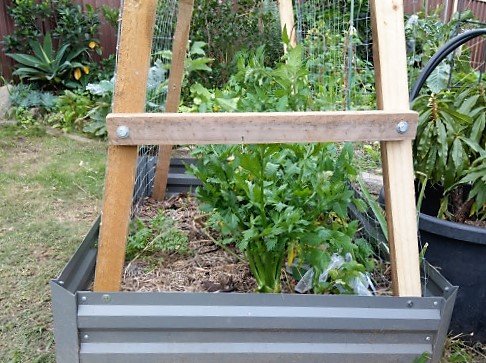
Step 7: Fix the side brace
Now you can add the side brace. Spread out the “A” frames to your preferred width. We set ours about 2 feet or 60cm apart. Cut your side brace to your preferred width (our was 21.5″ / 55 cm).
Mark the middle of the uprights, drill a hole in each end of the brace and through the uprights and fix this with bolts. Use a washer on either side.
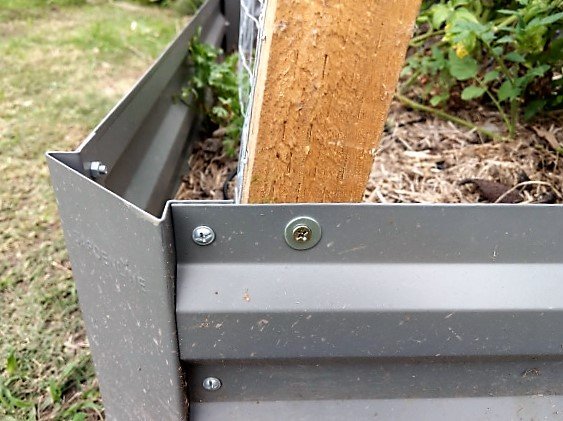
Step 8: Fix the frame to the ground or garden bed
Finally, we secured the trellis frame to the raised garden bed with a screw and washer. This is to ensure it doesn’t topple over in strong winds.
If you’re placing your frame in a regular garden bed, you push a tent peg around the bottom of the wire mesh and into the ground.
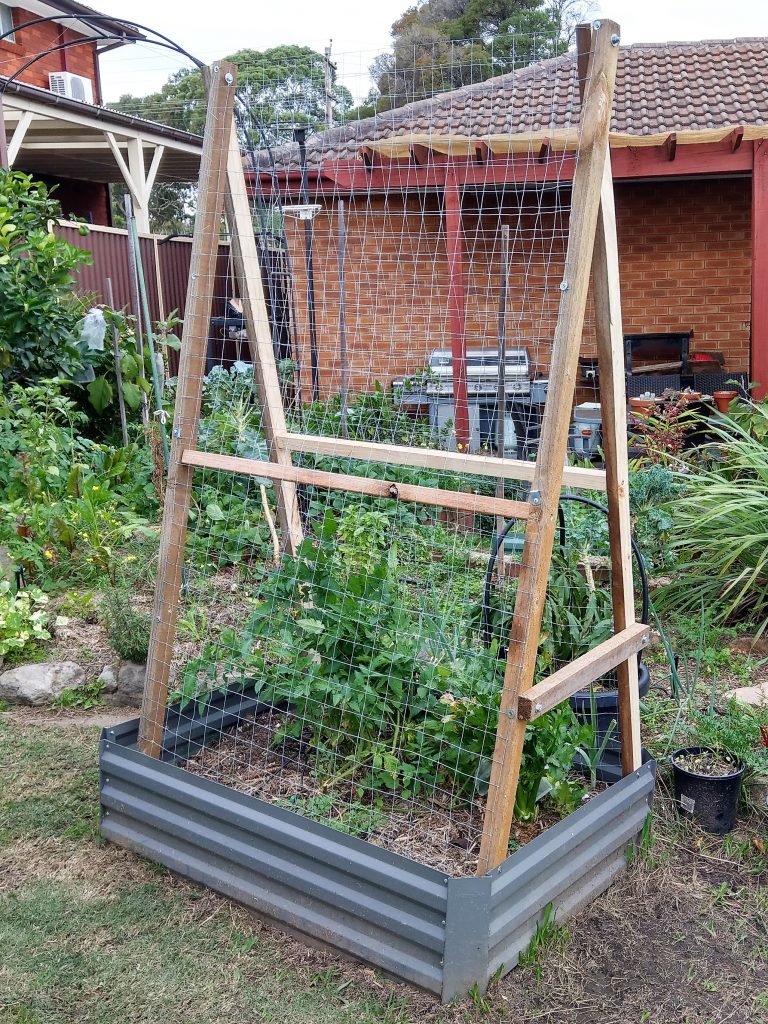
Step 9: Job done!
The completed cucumber trellis!
Conclusion
This DIY trellis for cucumbers is simple to make and was completed in just a few hours. Now I can plant out my cucumber seeds, knowing they have a specially built garden trellis ready to grow on and their future harvest will be well protected. And in the following season, I’ll be able to grow sugar snap peas and beans using the same trellis. Why not give it a try?
Further reading:
- How to Grow Lots of Cucumbers at Home
- 7 Reasons Why Your Cucumbers Are Turning Yellow
- Why Burpless Cucumbers Are Called Burpless
- How To Grow Sugar Snap Peas: Growing Guide And Tips
- Growing Cucamelons: Planting, Caring and Harvesting Cucamelon
- Growing Beans: Planting, Caring for, and Harvesting Beans
- 7 Reasons Why Your Green Bean Plants Are Turning Yellow
- Kiwano Melon: Grow African Horned Melon and Eat the Fruit
- 30 Surprising Things You Can Compost At Home
- Cucumber Flowers But No Fruit? Causes and Solutions
- What’s Eating My Cucumbers? And How to Get Rid of Them!