Mint is so easy to grow that given half a chance, it will happily spread and take over your garden. But if you grow mint in a pot or container, the fragrant perennial herb will be happy and productive and so will the rest of your garden. Because of its fast-growing nature, mint is often among the first herb plants home gardeners grow. And because mint grows abundantly in pots and containers it’s perfect for growing on balconies, indoors on windowsills and out in the garden. So let’s find out how to grow mint with our complete guide to growing mint at home.
Related: Why Mint Flowers | Reason for Small Mint Leaves | Mint Tastes Bitter |
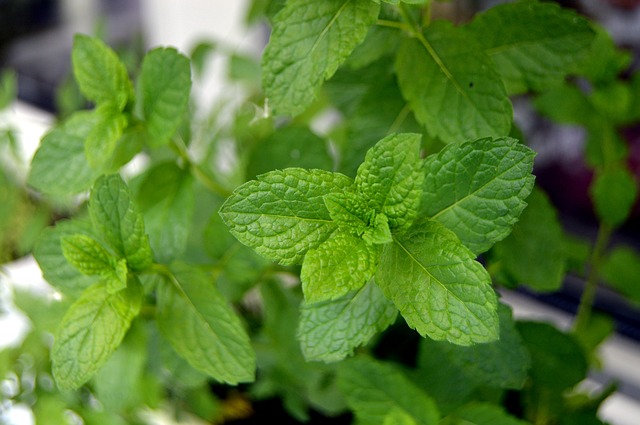
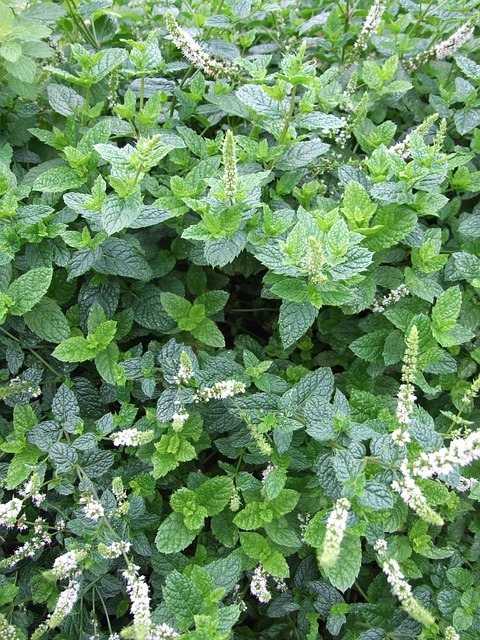
Mint is an aromatic, perennial herb with ridged leaves, that grow in opposite pairs and a square stem. The leaf colors range from deep green and bright green to sometimes purple-blue and light yellow. Originating from the Greek word mentha, mint belongs to the Lamiaceae family and grows widely throughout most of the world.
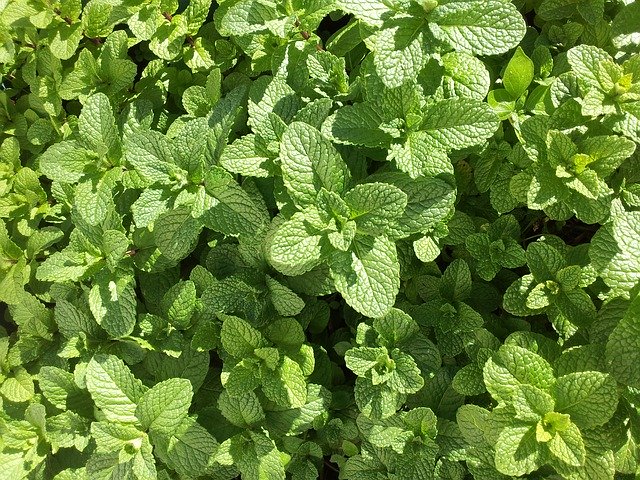
One of the most commonly grown mint plants in the home garden is spearmint, also known as garden mint. Spearmint is the common variety of mint sold in grocery stores. Spearmint grows 12 inches (30cm) high and 24 inches wide (60cm). Though mint spreads quickly by sending out horizontal runners and will quickly fill the growing space provided.
Over time, many home gardeners have experience in allowing mint to grow unrestricted in the garden – it’s a fun experiment. You excitedly observe how prolific your mint is growing, imagining all the dishes and drinks you can make with your abundant mint.
Until one day, in the not-too-distant future, the mint takes over all your garden growing space and you realize you had indeed heard that mint spreads vigorously and needs to be contained!
So it’s a really good idea to grow mint in pots, containers or other restricted space.
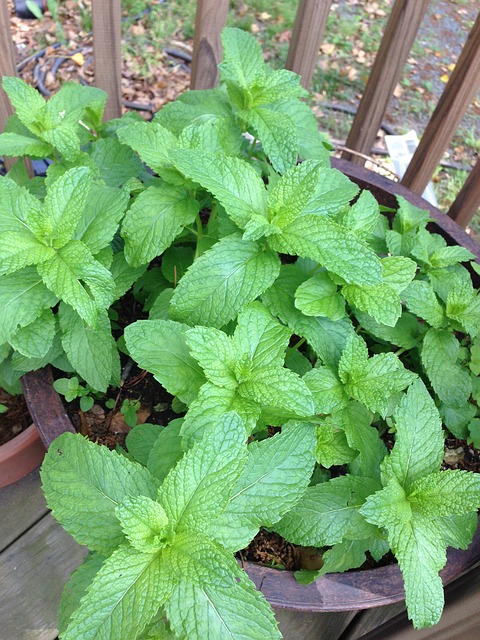
Table of Contents
Mint Growing Conditions
Climate
Mint can grow almost anywhere in a wide range of climates, from cool to hot temperatures. However, the optimal temperature is sunny days at 77°F (25°C) degrees down to cool days at 59°F (15°C) degrees. For hotter climates, mint grows well in shady areas and for cooler climates, mint is best grown in full sun.
Soil
Mint thrives in rich, moist and well-drained soil with a slightly acidic pH level between 6.0 to 7.5 (you can check the soil pH with a soil gauge).
Soil can be amended prior to planting with compost and well-rotted manure to improve moisture retention and provide nutrients for the mint plant.
Sun
Mint grows best in full sun, 6-8 hours a day. In hotter climates, mint also grows well in partial shade.
Water
The amount of water you give your mint will depend on your climate. Give the mint plant enough water to keep the soil moist.
You can check the moisture in the soil by inserting a finger into the soil about an inch (2.5cm) below the surface. If the soil is dry, water the mint and if it is still moist, there is no need for additional watering.
Watering may be a daily occurrence in the heat of summer and down to only weekly during winter, depending on your climate. You can also monitor soil moisture with a water gauge.
Use organic mulch around the mint plant to help retain moisture and prevent it from drying out too quickly.
Pruning
Keeping mint pruned is the key to a healthy-looking plant. Pruning encourages growth and keeps mint looking lush. Without regular pruning, mint can become ‘leggy’ looking with long woody stems and only a few leaves on the tips.
Pruning heavily during the dormant season will encourage the mint plant to produce healthy growth in the next growing season.
In cool climates, mint will go dormant in winter and in very warm climates it may be dormant in summer, if at all.
Prune mint down to a few inches (5cm) from the ground, cutting away all the woody stems to allow for fresh growth when the new growing season begins.
Fertilizer
Mint doesn’t require a high amount of fertilizer as long as you plant it in compost-rich and well-drained soil. Over-fertilization affects the flavor of the mint.
As a guide, fertilize mint once a year using homemade compost, composted manure or a combination of the two. Compost provides nutrients and promotes soil drainage.
Water the mint following fertilization to dilute the fertilizer and for the mint to better absorb the nutrients.
A good time to fertilize is when the mint plant starts to come out of dormancy. In cool climates this will be the start of spring and in hot climates it may be the end of summer (or it may not go dormant).
Liquid seaweed fertilizer can also be used a few times a year to encourage healthy growth. And if your soil is really lacking in nutrients, you can use an organic herb fertilizer like this one for an additional boost.
Mint Varieties
There are hundreds of mint plant varieties, however here are some of the most commonly grown varieties in the garden:
- Spearmint – Also known as garden mint and the most commonly grown mints for culinary use. It contains menthol of 1%.
- Peppermint – Intense minty flavor compared to spearmint due to the higher percentage of menthol of 40%.
- Watermint
- Orange mint
- Lavender Mint
- Pennyroyal
- Slender mint
- Forest mint
- Horsemint
- Chocolate mint
- Apple mint (or woolly mint)
- Ginger Mint
- Pineapple mint
Mint Propagation
Growing Mint From Seed
Seed collected from mint grown in the garden may have been cross-pollinated and therefore be unreliable to grow, so it is a good idea to purchase mint seeds from a reputable seller to ensure you start with viable seed.
To germinate mint seed, start with quality seed-raising mix (or homemade compost) in pots or peat pots. Keep the soil slightly moist but try not to let the soil become soggy. Sow 3-4 seeds in each shallow planting hole ¼ inch (1/2 cm) deep in the soil.
You can cover the pots with plastic wrap to speed up the germination process. Though you will need to remember to remove the plastic cover for a few hours each day to allow air circulation.
Place the pots in a light, bright protected position away from direct sunlight.
Ideally, mint seed germinates best at air temperature of 68-75°F (20-24°C) degrees.
Keep the soil moist at all times and be sure to water the seeds gently. A water mister is handy for watering seeds.
Germination takes 10-15 days and should be uncovered at this time. Once the mint seedlings grow two sets of true leaves (in addition to the first set of seed leaves), transfer them to a larger pot or container. Water new mint plants regularly.
Seedlings should be ‘hardened off’ by gradually exposing them to sunlight each day before placing them in full sun. This process ensures new seedlings and plants from cuttings are not shocked or stressed by their change of environment.
Hardening Off Plants
‘Hardening off’ plants and seedlings is a process of gradually exposing seedlings, or new plants from cutting, to sunlight each day.
To begin, place the mint seedlings outside in morning sunlight for 2-3 hours the first day. Morning sun is best as it’s gentle and won’t be as strong as the midday and afternoon sun.
Shift the plant into indirect light for the remainder of the day and return the plant to its previous growing environment for the night.
The following day, increase the direct sunlight hours by 1-2 hours and continue to do so over the next few days.
The process should take no more than 7-10 days.
Related Reading: Hardening Off Seedlings (& Avoiding Transplant Shock)
How To Grow Mint From Cuttings
Planting mint from cuttings is the best way to propagate them.
Look for a stem that is 4 to 6 inches (10–15 cm) long. Avoid the stems with flowers, as shown in the above photo and choose the stems with leaves only. You can also get a bunch of mint from the grocery store for growing cuttings.
Cut the stem below the point where the last leaves at the bottom grow. You can also find a node wherein new leaves start to sprout. Cut below that node.
Remove the lower leaves at the bottom and keep a few sets of leaves growing at the top.
Prepare the pot with soil and make a small hole to insert the stem’s base into. You can plant a number of cuttings in one pot depending on the pot size. In a 4-inch (10 cm) wide pot, you can easily plant 4-6 mint cuttings.
Gently pat down the soil around the cutting and water well. Keep the soil moist but not so much that it becomes soggy.
Place the new mint cuttings in a well-lit and protected position away from direct sunlight.
After 3-4 weeks you will start to notice new growth on the mint cuttings. Once they are established they can be transferred to a larger growing pot and hardened off, as above.
Planting Mint from Root Cuttings
Planting from root cuttings is very similar to stem propagation. Firstly, you’ll need to dig up the root of your mint plant or if it’s very wide, just a section. Inspect the roots and choose root extensions that measure around 6 inches (15 cm) long and cut them off.
Prepare a wide container that allows the mint plant to spread and grow horizontally. When ready, dig a hole in the soil and place the mint cuttings horizontally. Water the mint frequently to keep the soil moist. Avoid the soil drying out.
In approximately a month, the cuttings will start to grow new stems and leaves and you will have a new mint plant.
How To Grow Mint in Water
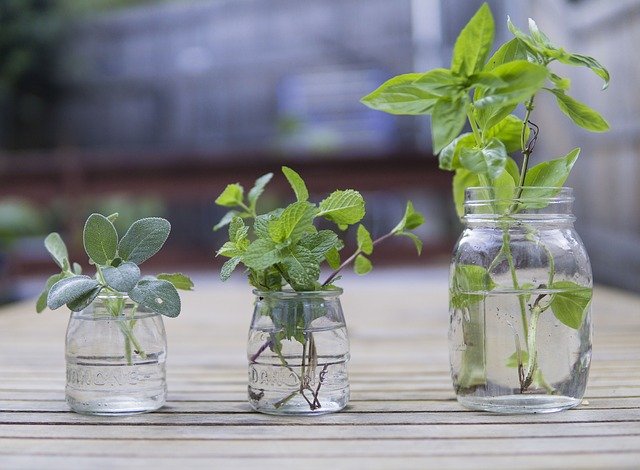
Select 4-6 inch (10-15cm) mint cuttings without flowers. Remove the lower leaves, keeping a few on top, and place the cuttings in a glass of water. Position the glass in a well-lit and ventilated place away from direct sunlight.
Be sure to change the water every second or third day to prevent the mint cuttings from rotting.
After a week, roots will start to appear. Wait for a few more days for the roots to lengthen and develop. The new mint plant will then be ready to be transferred to a pot with rich, well-drained soil.
Don’t forget to harden off new plants to help them acclimatize to new conditions such as moving into full sun.
Harvesting Mint
Harvest the mint leaves frequently to keep mint plants looking their best and producing well.
Before the mint flowers start to bloom, cut the stems 1-2 inches (2.5-5 cm) from the ground.
Mint can be harvested as soon as the leaves develop though it’s best to leave 1-2 inches (2.5-5 cm) of the stem from the ground so the plant can continue to flourish.
Young leaves are preferable to older leaves as they have better flavor.
You can also just pick the mint leaves as you need them.
Mint can be harvested from the plant many times over the growing season.
How To Use Mint
Mint can be used in so many ways, including medicinally and as a pest deterrent in the garden but this website is all about growing food. So here are some ideas for eating mint:
Cooking mint with proteins such as lamb (mint sauce!) and to flavor veggies and salads. You might like to see our recipe Easy Watermelon Salad Recipe with Feta, Mint, Balsamic.
Make a refreshing drink by adding mint to iced tea, smoothies, lemonade or something stronger.
Flavor combinations are endless but some popular choices include:
- Watermelon and mint.
- Cucumber, feta and mint.
- Lemon and mint.
How To Store Mint
It’s best to consume mint as soon as you harvest it. However, you can also preserve mint to be used later.
How To Store Mint In The Fridge
Method 1. Store fresh mint in the fridge by placing the stems in a glass or jar with 1 inch (2.5cm) of water. Cover with plastic and refrigerate. If properly stored, you can keep mint fresh in the refrigerator for 7-10 days. Replace the water if it gets cloudy.
Method 2. Lay the mint leaves on a damp paper towel. Wrap them up with paper towel then place them into a plastic bag. Seal the bag then put it in the fridge. The mint can last up to two weeks if stored this way.
How To Freeze Mint
Pick the mint leaves, remove and discard the tough stems and rinse the leaves. Pat the mint dry and place 1-2 teaspoons of mint leaves into each compartment of an ice cube tray filling them halfway. Top the ice cube tray with water then freeze.
Once frozen, remove the frozen mint ice cubes and put them in an airtight bag. Store them in the freezer for up to 3 months.
When you are ready to use the mint, simply defrost the mint ice cubes and once the water drains away you will have mint leaves on hand for your recipes.
Dry Mint
Another way of storing mint is by drying. There are a few methods to dry mint such as natural air-drying, oven drying, microwave drying, and using a dehydrator (my preferred method for convenience and consistent results).
Once dried, crush the mint leaves and store them in an airtight container. Always store the mint-filled containers in a cool, dry place, away from light to avoid exposing them to moisture. If stored properly, it can last for 3-6 months.
Common Pests and Diseases
There aren’t too many pests, diseases or problems that bother mint. And most of them can be managed by picking off the affected leaves. However, here are some problems to look out for.
Mint Rust
This disease is caused by fungus. A sign of this disease is when you see dusty spots (they look like rust) on the leaves. You will also see that new shoots are pale and distorted. This disease can result in plant death.
Infected plants and rhizomes should be removed as soon as possible to prevent spread. Heat treatment of roots may also help to control the disease. Leave the roots in hot water for 10 minutes then let them cool in cold water and replant them. Hot water should not exceed 111°F (44°C) as this will kill the plant.
Aphids
Aphids are small, soft-bodied insects on the underside of leaves and/or stems of the plant. They are mostly white, black, brown, gray, yellow, light green, or pink.
These small insects attack the mint leaves by sucking out their sap. A sign of aphids is when your plant leaves begin to curl and turn yellow.
If the aphids haven’t spread much yet, prune the infested mint leaves or shoots.
You can also spray the infested leaves with a garden hose. Hose down the plants 1-2 times a day until they start to thin out.
Insecticidal soap is helpful to control them too.
Cutworms
Cutworms (larvae of moth) hide in the soil during the day at the plant’s base or in its debris. They are up to 1 inch (2.5 cm) in length with a wide range of colors and patterns. Cutworms will curl up into a C-shape when disturbed.
To get rid of them, maintenance of the garden area is important. Clean out plant debris, then to control them naturally and organically, spread diatomaceous earth around the base of the mint plant.
Cutworms sleep during day and become active at night, so you can also visit the garden during this time and hand-pluck the larvae from the plant.
Thrips
Thrips are very tiny insects but visible to the eye. If the leaves are infested with a high thrips population, they will curl and distort.
It is important to maintain your garden well to reduce the places and areas where thrips may breed. If they become a serious problem, it’s good to have some insecticidal soap or neem oil handy.
Spider Mites
Spider mites are tiny sucking pests that can quickly damage your garden. They thrive in dusty conditions and are common in hot and dry conditions. Spider mites are classified as Arachnids, in the same kind as the spiders, and scorpions.
Damaged leaves will show webbings and tiny spots, which will then change color and fall off.
Spraying plants with a strong jet of water can reduce the buildup of spider mite population.
Make sure that the plants are adequately watered.
For organic control, horticultural neem oil is a good solution.
- Related reading: What’s Eating My Mint? (Holes in Mint Leaves)
Conclusion
Mint is a flavorful and versatile herb to grow in the garden. And growing mint is easy and fast so it’s a perfect edible plant for beginner gardeners. Just remember, mint is a vigorous grower so plan to contain it in a pot, container or restrictive growing space so it doesn’t take over your garden. Then sit back and enjoy watching this low-maintenance herb grow healthy sprigs of mint leaves for you to use in your culinary dishes or delicious drinks.
Recommended Products
- Soil, Light and Water Gauge
- Liquid Seaweed Fertilizer
- Seed Raising Potting Mix
- Seed Starter Peat Pots
- Water Spray Bottle – for gently watering seeds.
- Food Dehydrator
Some of My Favorite Gardening Products
- AeroGarden Bounty Indoor Hydroponic Herb Garden
- Heirloom Herb Seeds Set
- Haws Handy Plastic Indoor Watering Can
- Raised Bed Garden
Further reading:
- Growing Parsley: Planting, Harvesting and Storing Parsley
- How To Grow Cilantro: Tips For Growing Cilantro
- How To Grow An Abundance Of Dill For Your Edible Garden
- 7 Tips To Successfully Grow Basil At Home
- How to Grow Lemongrass: Planting and Growing Guide
- Drought Hardy Herbs To Plant At Home
- How To Grow Ginger: Guide To Growing Ginger At Home