
Growing your own broccoli brings a lot of satisfaction. Being able to harvest beautiful large broccoli heads and cut one up for dinner will make you feel like a vegetable gardening champion! And once you learn the tips and tricks for growing your own broccoli, you’ll never look back. So let’s find out how to grow broccoli for a delicious crop at home.
To successfully grow broccoli, my top tips are to plant in the the right climate, ensure you plant broccoli in a sunny location, make sure your soil is fertile and well-draining, keep broccoli well watered, nourish broccoli with organic fertilizer and protect your plants from pests who love broccoli as much as you do.
Now let’s find out more details about planting broccoli (Brassica oleracea var. Italica), harvesting, growing problems to look out for, and the different types of broccoli you can choose to grow at home.
Related: Why Broccoli Tastes Bitter | Reasons Why Broccoli Is Turning Yellow | Why Is My Broccoli Flowering?
Table of Contents
Grow Broccoli in the Right Climate
Broccoli is a cool-season vegetable that thrives in specific climate conditions. The ideal temperature range for broccoli is between 45°F to 75°F (7°C to 24°C).
For spring planting, you can start broccoli seeds indoors 6 to 8 weeks before the last expected frost date, typically in late winter. Once seedlings are about 4-6 weeks old and have a few leaves, you can transplant them into your garden.
In cooler regions or areas with mild winters, you can also plant a fall crop. Start broccoli seeds indoors in early to mid-summer, and transplant them into the garden when temperatures begin to cool down in late summer or early fall.
Sunlight Requirements for Broccoli
Broccoli is a sun-loving vegetable and as such requires the right amount of sunlight for healthy growth. Understanding its sunlight needs is important for successful growth.
Broccoli thrives when planted in full sun which is at least 6-8 hours of direct sunlight daily.
Adequate sunlight is essential for head formation, proper photosynthesis, and the development of delicious flavor.
If broccoli doesn’t receive enough sunlight, it can become leggy, with long, weak stems and sparse heads with unappealing flavor. Side shoot growth will also be reduced.
So look for a sunny location to plant your broccoli for the best results.
Soil Conditions for Growing Broccoli
Broccoli thrives in fertile, well-draining, soil. Adding organic matter like compost and aged manure will improve the soil structure and feed the soil to ensure it’s healthy.
Broccoli prefers slightly acidic to neutral soil with a pH range of 6-7. You can adjust the pH by adding lime to raise it or sulfur to lower it if required. I find regular additions of compost help keep a balanced pH that vegetables will thrive in. A soil gauge can help you test the soil pH.
Compost improves soil fertility, structure, and moisture retention. So I always add compost to the soil before planting broccoli.
Planting Broccoli
You can prepare your soil in advance of planting by making sure it’s free from weeds. I prefer not to leave my soil exposed once weeded, so you can use a layer of mulch at this point to keep the soil protected. Mulch will also help retain moisture and feed the soil as it breaks down over the growing season.
When it comes to growing broccoli, you will either be growing broccoli from seed or transplants.
Growing Broccoli from Seeds
Seeds are started indoors or directly in the garden. Starting broccoli indoors is usually done because it is too cold to plant them directly in the garden and starting them indoors gives you a head start on the growing season.
Broccoli seeds can be started indoors 6-8 weeks before the last expected frost date. For growing indoors, I use a heat mat and natural light but if you need additional lighting you can use a grow light.
Another reason to start broccoli seeds indoors is if you are growing a fall crop and therefore need to start seeds indoors during summer to keep them a bit cooler.
If you’re starting seeds directly in the garden, plant the broccoli seeds ½ inch (1.27 cm) deep, spacing them about 3 inches (7.62 cm) apart in rows. Allow about 18-24 inches (45-60 cm) between rows.
I like to plant a few seeds in each hole to make sure germination is successful.
Give the planted broccoli seeds a good water. The initial watering should be deep, but gentle so as not to dislodge the seeds from the soil. This will help start the process of germination.
Seedlings should later be thinned when they reach 2-3 inches (5-7.5 cm) to allow for the correct spacing of 18-24 inches (45-60 cm) apart. You can either do this by cutting the seedling at the ground level (you can eat it as a broccoli microgreen) or gently lift the seedling from the ground and transplant it to another part of the garden.
Broccoli Transplants
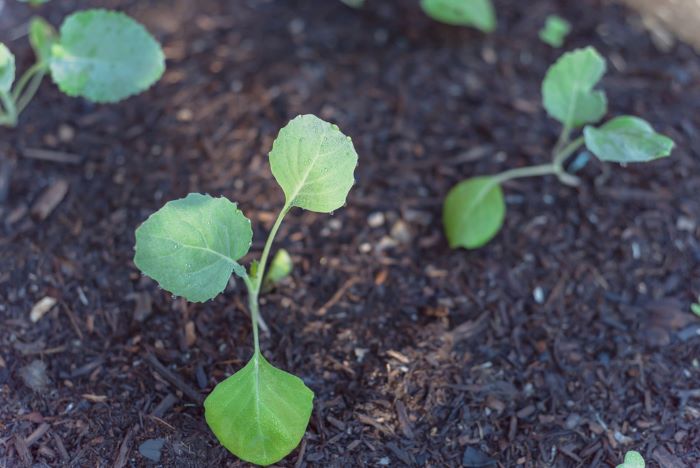
If you are using broccoli transplants, dig holes that are as deep as the container the transplant is in and wide enough to accommodate the root system. Gently remove the broccoli transplant from its container and place it in the hole at the same soil level it was in the container.
Space broccoli transplants 18-24 inches (45-60 cm) apart in rows, with 18-24 inches (45-60 cm) between rows.
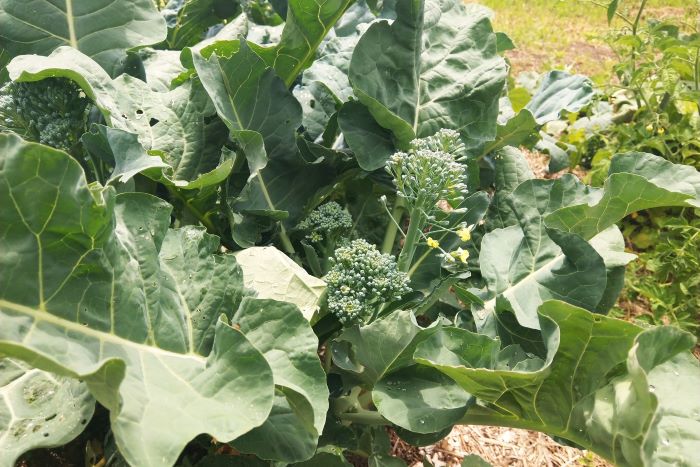
Depending on the variety you are growing, broccoli can grow to 2 feet tall (60 cm) and wide so proper spacing for planting broccoli will ensure healthy growth, optimal development, and maximize your yield.
Water well after planting your broccoli transplants to settle the soil and ensure good root-to-soil contact.
Broccoli Watering Needs
Broccoli plants require consistent moisture to thrive, but it’s important to water them properly to prevent issues like head rot.
The frequency of watering depends on your local climate and weather conditions. As a general guideline, aim to provide about 1 to 1.5 inches (2.5 to 3.8 cm) of water per week through rainfall and irrigation.
When watering, focus on watering at the base of the broccoli plants rather than overhead. You can use a soaker hose or a drip irrigation system to avoid wetting the broccoli heads, to prevent head rot and fungal diseases.
It’s a good idea to water your broccoli early in the morning. I do this with the help of a timer on my watering system, this way I don’t forget to water! Morning watering allows everything to dry out a bit during the day and this will reduce the risk of diseases caused by wet conditions.
I like to apply a layer of organic mulch, such as straw or hay around the broccoli plants. Mulch helps to retain soil moisture. It also keeps the soil temperature stable and prevents weeds, which can compete for moisture with your broccoli.
Fertilizer for Broccoli
Broccoli benefits from a balanced fertilizer applied every four to six weeks after planting. I like to use an organic fertilizer like this one. This helps supply nutrients to the soil for sustained growth and broccoli head development.
Check your packaging for the application amount as you don’t want to over-fertilize your broccoli or you may encourage leaf growth over head development. As a guideline, an application of 1-2 pounds (0.45 to 0.9 kg) per 100 square feet is often used for granular fertilizer.
If you have access to your own homemade compost, I like to alternate applications of compost and fertilizer.
Harvesting Broccoli
Broccoli is ready for harvest when it exhibits certain signs, including head size and color. Here’s how to tell when broccoli is ready to be picked.
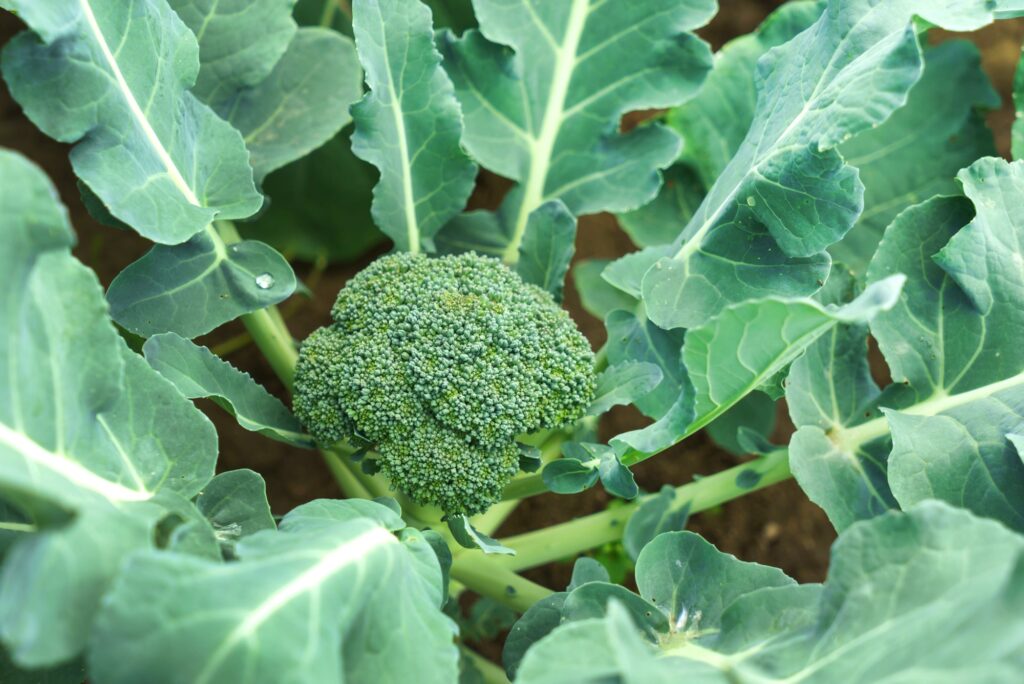
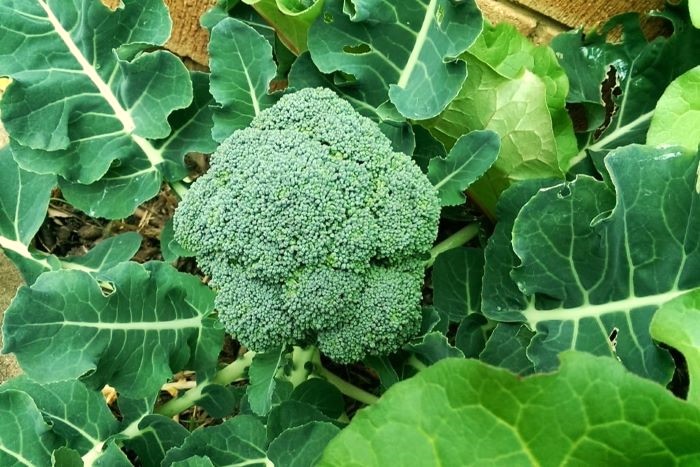
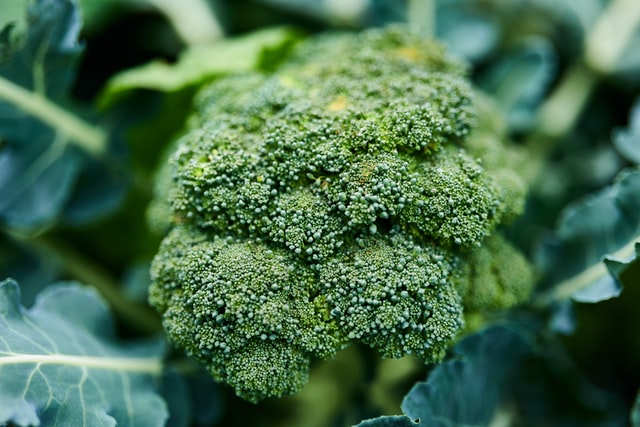
The central head of broccoli should be firm, compact, and reach a good size, typically around 6-8 inches (15-20cm) in diameter. The individual florets should be tightly packed.
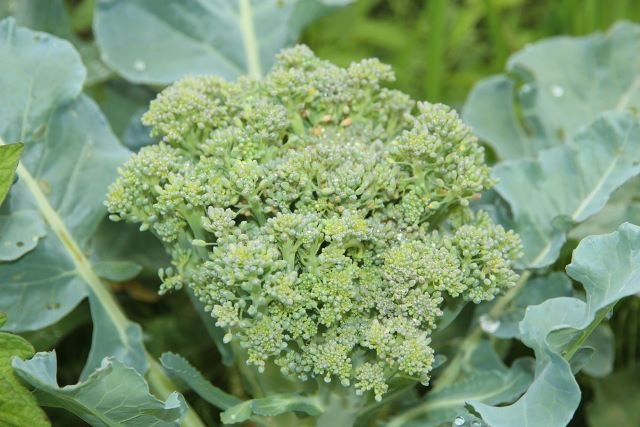
The head color is an important indicator. When the broccoli head is deep green and the florets are well-formed, it’s time for harvest. If the broccoli head starts to turn yellow, it’s usually a sign it’s overripe.
Most broccoli varieties are ready for harvest approximately 60 to 100 days after transplanting or seeding, depending on the variety and growing conditions.
Once you have established your broccoli is ready to harvest, you can go ahead and cut the head. I like to use a sharp knife. Then position the knife just below the central head where it meets the main stem.
Make a slanted cut to remove the central broccoli head with a few inches of stem attached. This encourages the plant to produce smaller side shoots, extending the harvest season.
Be sure to leave the smaller leaves on the broccoli plant as these continue to support side shoot production.
Once the central head is removed, many broccoli varieties will produce smaller side shoots from the leaf axils. These side shoots are also edible and can be harvested as they reach a suitable size. Harvesting will encourage more growth.
Did you know you can also eat broccoli leaves and flowers? It’s true!
Broccoli will remain fresh for 3-5 days if stored properly in the refrigerator. Store in the crisper without washing which should only be done prior to using it.
Broccoli Growing Problems: Pests and Disease
Broccoli Pests
There are a number of pests to look out for when growing broccoli. One of the easiest ways to deal with pests is to protect them with some type of row cover. Broccoli doesn’t need to be pollinated so you can keep the cover over your broccoli for the entire growing season and you will eliminate fighting with the otherwise inevitable pest invasion.
However, if you choose not to use a cover, there are a number of pests you might find munching on the leaves of your broccoli plant, the head, and the stems.
Products I mention below to help control and eliminate broccoli pests that are also safe to use in the organic garden:
- Row Covers
- Neem Oil
- Insecticidal Soap Spray
- Diatomaceous earth
- Slug and Snail Bait
- Beneficial Nematodes
- Sticky Traps
Cabbage Worms and Loopers (Imported Cabbage Worm, Cabbage Looper)
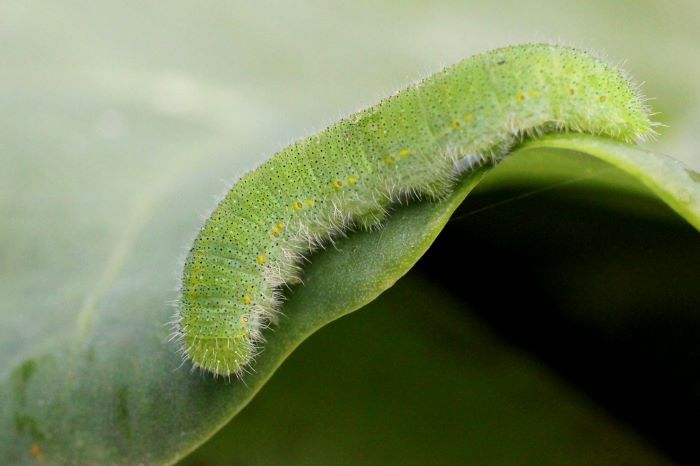
These green caterpillars feed on broccoli leaves and heads, leaving behind ragged holes.
The best way to deal with them is to handpick caterpillars and destroy them. Use floating row covers early in the season to prevent adult moths from laying eggs. And spray with neem oil.
Aphids
Aphids are tiny, soft-bodied insects that cluster on new broccoli plant growth, sucking sap and causing distorted leaves.
The first thing to do to get rid of aphids is to give them a spray with the garden hose. Beneficial insects like ladybugs and lacewings will also help keep the aphid population in check, so encourage them into your garden with flowering plants. Finally, you can use insecticidal soap spray if you have a large aphid infestation.
Flea Beetles
These small, jumping beetles create small holes in broccoli leaves.
You can use row covers as a physical barrier. Otherwise, apply diatomaceous earth around broccoli plants. Neem oil can also be effective.
Slugs and Snails
These garden pests feed on broccoli leaves, creating irregular holes.
You can handpick slugs and snails during the evening but my preference is to use a pet and wildlife-safe bait.
Root Maggots (Cabbage Maggot)
The larvae feed on the roots of broccoli plants, causing wilting and poor growth.
One effective method is to add beneficial nematodes to the soil to control larvae. You can also use row covers to prevent flies from laying eggs near plants.
Harlequin Bugs and Stink Bugs
These shield-shaped insects damage broccoli plants by sucking sap and causing wilting.
You can handpick bugs and drop them into soapy water – use protective clothing with gloves for this! I also use tongs on stick bugs to avoid any possible spray they emit. Companion planting with herbs like basil and catnip can help deter them.
Cutworms
These caterpillars cut through broccoli seedlings at the base, causing them to topple over.
You can try placing collars made of cardboard or aluminum foil around seedlings. And beneficial nematodes can control cutworm larvae in the soil.
Thrips
These tiny, slender insects feed on broccoli leaves and can transmit diseases.
I like to use stick traps around my garden. You can also apply neem oil or insecticidal soap if infestations occur.
Related: What’s Eating My Broccoli? (And how to get rid of them!)
Broccoli Disease
Broccoli plants can be affected by plant diseases every now and then. You can reduce the risk of potential disease by maintaining a healthy garden and planting a diverse range of plants.
Even with your best efforts, you may come across a disease-affected broccoli plant. So here is a rundown of what they are.
Products I mention below to treat broccoli plant diseases that are safe to use in the organic garden:
Black Rot (Xanthomonas campestris)
Black rot causes V-shaped lesions on broccoli leaves, which can lead to plant death.
To prevent Black rot, practice crop rotation, ensuring broccoli isn’t planted in the same spot for at least three years. Remove and destroy infected plant material and use disease-resistant broccoli varieties.
Downy Mildew (Hyaloperonospora parasitica)
Downy mildew appears as yellow, angular spots on broccoli leaves.
A good preventative measure is to provide good air circulation around broccoli plants. You can apply copper-based fungicides as a preventive measure. And when watering, water the soil, not the leaves.
Clubroot (Plasmodiophora brassicae)
Clubroot causes swelling and distortion of broccoli roots, resulting in wilting and stunted growth.
To prevent Clubroot, practice crop rotation and avoid planting broccoli in affected soil. Maintain proper soil pH levels (around 7) using lime if required. Use resistant broccoli varieties.
Powdery Mildew (Erysiphe cruciferarum):
Powdery mildew appears as white, powdery spots on broccoli leaves, stems and heads.
If you spot powdery mildew, start by removing the affected leaves. You can use a DIY milk spray like this one or neem oil. Ensure proper plant spacing for air circulation.
Alternaria Leaf Spot (Alternaria brassicae):
This disease causes small, dark spots with concentric rings on broccoli leaves.
If you notice the tell-tale signs of Alternaria Leaf Spot, remove and destroy the infected leaves. Then apply neem oil or copper-based fungicides as needed. Properly space plants to reduce humidity.
White Mold (Sclerotinia sclerotiorum)
White mold causes a fluffy white growth on broccoli leaves, which can lead to plant wilting.
A preventative measure is to space broccoli plants for good air circulation. Remove and destroy infected plants and avoid overhead watering.
Bacterial Soft Rot (Erwinia spp.)
Bacterial soft rot leads to slimy, foul-smelling broccoli heads – yuck!
To avoid this disease, harvest broccoli heads promptly when they mature. And avoid overhead watering to prevent soil splashing onto the broccoli heads.
Aphid-Transmitted Viruses (e.g., Cauliflower Mosaic Virus)
Aphids transmit viruses that can cause mosaic patterns and distortion in broccoli leaves.
To prevent these diseases, manage aphid populations organically as previously mentioned in this article.
Healthy soil, proper watering practices, and regular inspections are really important for disease prevention. If you do happen to spot an infected broccoli plant, be sure to take action to prevent the further spread of the disease.
Related: Why Is My Broccoli Dying? Causes and Solutions
Broccoli Varieties
Finally, before planting your broccoli, you need to decide which variety (or varieties) you would like to grow. Broccoli comes in a number of varieties so you don’t need to be limited to just one. Why not choose two or three?
You might find you develop a preference for one and in future seasons you will know your favorite to grow. Here are a few options for you to try out at home.
Calabrese Broccoli (Brassica oleracea var. italica). This is the standard broccoli variety, known for its large, green heads and abundant side shoots. It’s a popular choice for home gardeners because once the larger head has been harvested, the plant continues to produce smaller side shoots, extending the harvest period.
Broccoli Raab (Brassica ruvo). Also known as Rapini or Spring Broccoli, it has smaller, tender shoots with a slightly bitter taste. Broccoli Raab is quick to mature and thrives in cooler climates. It’s a great choice for those looking for an early harvest.
Romanesco Broccoli (Brassica oleracea var. italica ‘Romanesco’). Known for its unique appearance with spiraled, lime-green heads. It has a slightly nutty flavor and is a visually striking addition to the garden. It’s also more heat-tolerant than other varieties.
Purple Sprouting Broccoli (Brassica oleracea var. italica). This variety produces numerous purple or green shoots rather than a single large head. It is cold-hardy and provides a late winter to early spring harvest when few other fresh vegetables are available.
De Cicco Broccoli (Brassica oleracea var. italica). This is a popular heirloom variety with small-to-medium-sized heads. It’s known for its tolerance to variable weather conditions.
Waltham 29 Broccoli (Brassica oleracea var. italica). A classic variety with uniform, medium-sized heads. Waltham 29 broccoli is excellent for late-season growing and is cold-resistant, making it suitable for northern regions.
Broccolini (Brassica oleracea var. italica ‘Asparagaceae’). A hybrid between broccoli and Chinese kale, it has slender stems and small florets. Broccolini has a milder, sweeter taste and a longer harvest window. It’s ideal for those looking for a more delicate broccoli flavor.
You might also like to consider Green Duke, Green Magic, Paragon, Green Goliath, and Flash.