
Turmeric is a wonder plant for our health and an attractive edible plant to grow in the vegetable garden. So let’s find out how to grow turmeric at home so you can harvest your own turmeric rhizomes this season.
Turmeric features in Asian food, and we frequently see it as somewhat mysterious. Few people would recognize a turmeric plant if they saw one and most people have no idea how it grows. Well, that is about to change!
The great news is that turmeric is surprisingly easy to grow. All you have to do is give it the right conditions, and you’ll have an attractive plant and plenty of fresh turmeric.
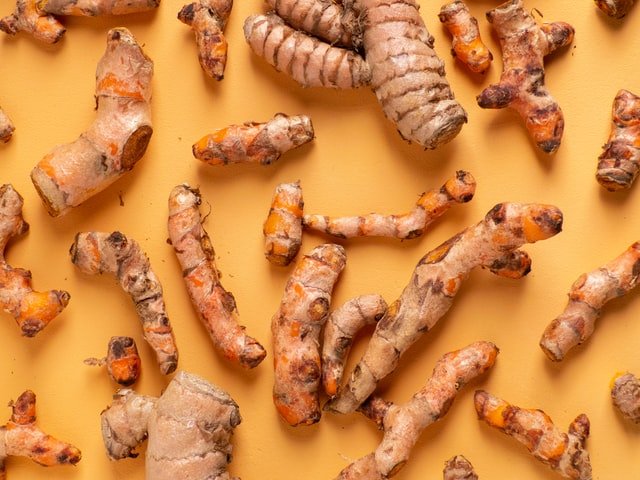
Table of Contents
- Why Grow Turmeric
- Turmeric Health Benefits
- How to Grow Turmeric Root
- How to Grow Turmeric in Pots
- How to Grow Turmeric from Store Bought
- Planting Turmeric
- How Long Does it Take To Grow Turmeric?
- Harvesting Turmeric
- Storing and Preserving Turmeric
- How To Make Turmeric Powder
- To Store Turmeric for Replanting
- Conclusion
- Recommended Products:
Why Grow Turmeric
Turmeric is a very attractive plant. Block together a few of them in a border, centre of a herb garden or in a vegetable patch and it’s quite spectacular. The turmeric rhizome produces single green stalks that have the leaves wrapped around, and they gradually unfold, giving a display of broad, green, deeply veined leaves.
The botanical name for turmeric is Curcuma longa and it is part of the Zingiberaceae family which also includes ginger, galangal and cardamom.
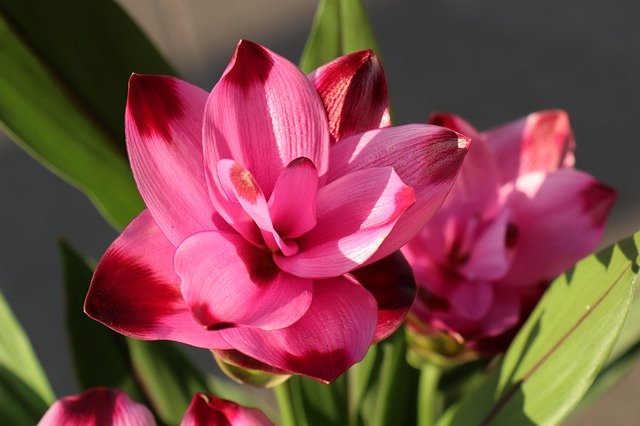
Should your turmeric flower, the flowers are stunning. They are funnel-shaped and can be delicate pink-tipped white, dark pink-tipped white, pink with dark pink tips (see below image), yellow and white or even multi pink white and yellow.
The whole turmeric plant is edible, though the stalk may be a bit tough. The leaves and flowers can all be eaten but it is the rhizomes that contain the curcumin that has the main healing properties (more on this below). Though it is well known in India that the crushed leaves aid digestion.
Turmeric Health Benefits
There are many health claims made about the medicinal benefit of turmeric. And that’s because turmeric contains an active compound known as curcumin that is proven to be a formidable anti-inflammatory and powerful antioxidant. Just another reasons that turmeric should be in your life! If you’re looking for more information on the health benefits of turmeric you might like to see our article: Medicinal Benefits of Turmeric for Health and Wellbeing.
How to Grow Turmeric Root
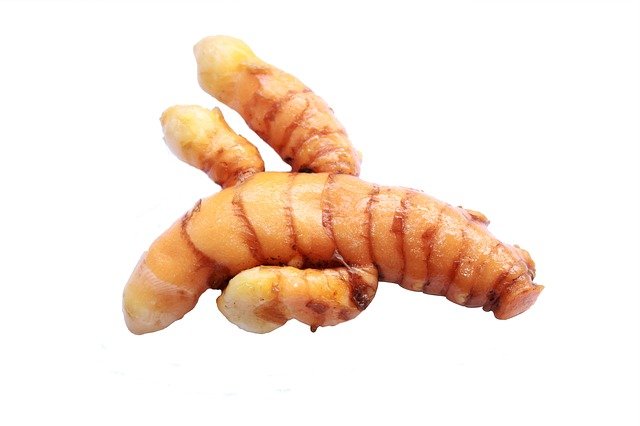
Turmeric doesn’t have a traditional root system. Rather it grows from a rhizome like ginger and is closely related to ginger.
Ideal Climate
While turmeric is easy to grow anywhere, consider where it comes from to get the most from it. Turmeric originates from south-east Asia which enjoys a tropical climate – hot and wet. So in most areas, grow it during the warmest time of year and water frequently.
Turmeric can be grown in the ground or in containers outside when the ideal temperature is between 68-95oF (20-35oC).
Below this and you just need to plan a little more carefully and start the process off in containers inside. Then move to the outside for the summer months and harvest your crop in the fall.
Your turmeric needs warmth, water and sun, and because they are slow to show signs of growth, I suggest they also need patience!
Soil
Turmeric loves fertile, free-draining soil, it will grow in most conditions, but to get the best from it, plant in the most suitable soil. Help provide the right soil with the addition of well-rotted manure and compost.
Sun
Plant turmeric in full sun and preferably where the plant will gain the maximum possible sunlight. Some people report problems with the leaves scorching in full sun, this might be after a shower of rain or it may be when there is insufficient water in the plant’s system. A compromise is to plant the turmeric in a central location of the vegetable patch so that the other plants offer shade to the sides and water won’t evaporate so quickly.
Turmeric is not a fussy plant and will take partial shade. So if your summer temperatures tend to be particularly hot and dry, planting in an area of partial shade to protect from the afternoon sun is advisable to avoid leaf scorch.
Water
When turmeric is first planted, care should be taken that the rhizomes do not sit in soggy soil. Remember the ideal soil is free-draining. When first planted, water in gently.
Once the turmeric starts to sprout, water frequently during the growing season. Remember turmeric is from a tropical climate and the closer you can mimic the growing conditions the better. Closer to harvest time, the water can be reduced.
Fertilizing and Mulch
Feed turmeric plants frequently in the growing season using well-rotted manure, chicken manure pellets, blood and bone or homemade compost. You can use what you have on hand and apply at a frequency of every three weeks. I like to alternate the fertilizer with a top dressing of compost and then the next time another form of fertilizer, such as the pelletized chicken manure.
Mulch the soil with an organic mulch to help protect the soil from drying. The turmeric shoots will push through the much and over time the mulch will help feed the soil. For more ideas, you can read our article on natural and organic mulch.
How to Grow Turmeric in Pots
Turmeric will grow well in pots and containers so they make an ideal patio plants.
They need full sun and well-draining soil. So use a quality organic potting mix and add compost and well-rotted manure to provide the turmeric with the best start.
Keep on top of the watering, especially in hot weather. Watering turmeric grown in pots will need to be more frequent than turmeric grown in the garden because pots and containers tend to dry out quicker.
Provide additional fertilizer at a frequency of ever 2-3 weeks to turmeric grown in pots and it will perform well for you.
They grow well crowded in together, so you can grow a few turmeric plants in one pot.
Turmeric only needs to be planted 1-2 inches (2.5-5cm) below the soil surface so a wide pot is ideal. Choose a pot that is at least 12-16 inch (30-40cm) in diameter to allow adequate growing space. In this container size, the turmeric will have room to grow across the container.
How to Grow Turmeric from Store Bought
It is easy to grow turmeric from store-bought. When buying turmeric to grow on, look for certified organic from the store, the reason for this is that non-organic may have been treated to preserve it and prevent sprouting, so it is unlikely to grow. Select a piece that has noticeable nibs or little bumps, and these are where the plant will grow.
Choose a piece of turmeric that looks in good condition, and if there is a choice, choose a variety that is more orange in color. The orange-coloured variety turmeric contains more of the healthy ingredient curcumin.
If you cannot find it your local store, then health food stores or natural food stores and Asian markets are likely to sell turmeric.
Failing finding fresh organic turmeric rhizomes to buy in any stores, you can order from an online seed store to arrive in time for the growing season.
Planting Turmeric
Preparing turmeric for planting starts about a week before you intend to plant them.
Select the rhizomes with nubs on and cut them into smaller pieces approximately 2-3 inches (5-7.5cm) in size using a clean, sharp knife. Select a position to cut that looks like a natural place the rhizome could break off. Look for pieces that have at least two, but ideally three little nibs. Leave on an airy shelf for about a week for the cuts to heal, or a minimum of two days. If you plant straight after cutting into pieces, there is a chance the rhizomes may rot.
Before planting, you can soak in water for one to two hours to encourage sprouting. Although this is not completely necessary, it can be helpful if the turmeric looks especially dehydrated. Evident by a shrivelled and wrinkled appearance.
Place the turmeric rhizomes with buds pointing upwards and plant them around 6 inches (15cm) apart and 1-2 inches (2.5-5cm) below the soil surface. Take care not to plant them too deep.
If starting indoors, I’d plant them the same way I do with ginger; closer together and then increase to 6 inches (15cm) apart when planting them out into the ground or a larger container outside.
If you are in a climate with a shorter summer then give the turmeric plants a head start either when you plant them or to mimic warmer weather about a month before planting out.
- The pot can be placed on a warm mat to encourage faster sprouting
- Cover with a clear plastic bag to create warmth and mimic humidity to encourage growth
- Place on a sunny windowsill for additional light and warmth
- Utilize a heat lamp. Turmeric loves temperatures of around 68-95oF (20-35oC) so growth can be encouraged by keeping between those temperatures indoors. However, take care when you plan to move the turmeric outside that the temperature outside is not much cooler than the plant has become used to inside.
Turmeric can grow over 3 feet (1 meter) tall so allow adequate room in the garden where is won’t shade out other sun loving plants.
How Long Does it Take To Grow Turmeric?
Turmeric is a plant that requires a long growing season. You will need a good eight to ten months from planting to harvest in frost-free conditions.
In cooler climates, turmeric can be planted in the winter indoors before moving outdoors in spring. And then harvested during the following fall or early winter.
Harvesting Turmeric
The right time to harvest the turmeric is after the leaves have died back. Waiting gives the plant time to transfer energy into the turmeric rhizome. This improves the quality and taste of the turmeric – and they store better.
Look out for when the leaves turn yellow and then brown and brittle. At this time reduce the water but don’t stop completely.
To harvest turmeric you will need to dig the plants out, using a fork or a hand trowel. Gently tease the rhizomes out to avoid damaging the turmeric. Dig out the rhizomes with care, testing the area around the plant and loosening the soil as you go. Then the rhizomes can be gently lifted out by fork or hand trowel.
When growing turmeric in a pot or container, it’s often easier to turn the container on its side and gently tease out the plant and soil. Then simply sift through the soil for the turmeric from the side instead of from above.
Storing and Preserving Turmeric
Once you have harvested the turmeric, remove as much soil as you can from the rhizomes. You will notice the rhizomes comprise of the familiar finger-shaped part and some will have a bulbous part with root matter on. Separate and keep the bulbous part for replanting next season or it can be composted. The bulbous rhizome is edible, and many do eat it, though it’s not particularly enjoyable.
Then the rhizomes should be rinsed to clean off any remaining soil and carefully cut away from the stalks.
Lay the cleaned rhizomes out to dry. Once dry, the turmeric can be used or stored.
Turmeric will stay fresh on the shelf in a cool location or in an airtight container or bag stored in the fridge for a few weeks
Turmeric can also be frozen whole or cut into smaller pieces and frozen and will last for 6 months.
Another way to preserve turmeric is to dry it.
How To Make Turmeric Powder
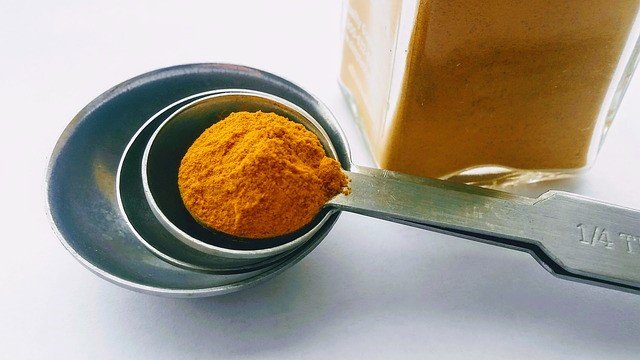
Of course, the most common way to buy turmeric is as a powder. And the good news is you can powder your homegrown turmeric as well. Here’s how to make your own turmeric powder.
- Wash the harvested rhizomes that you want to use and put them into a pot of water and bring to the boil
- Simmer until you can pierce them with a fork, usually 40-50 minutes or up to 1.5 hours for a large batch
- Drain well
- Wearing rubber gloves as the turmeric will stain your hands bright orange, remove the skin by rubbing off with fingers. Or you can keep the skins on and the final product will be slightly darker in color than without the skin.
- Slice the turmeric into 1/4 inch (1/2 cm) thick pieces
- If you have a food dehydrator set it to about 110oF (43oC) degrees
- Dry the turmeric until the rhizome pieces are brittle and snap when broken. At the above temperature, drying time maybe 10 hours but this will depend on the ambient air and humidity levels.
- Once completely dry, grind the turmeric in batches using your preferred method which may be
- in a spice mill
- mortar and pestle
- coffee grinder
If your method of grinding leaves behind some lumpy pieces of turmeric, use a sieve to sift the power and return any remaining lumpy turmeric for further grinding to produce the desired consistency.
10. Store in sterilized jars and use as required.
Turmeric powder will last around six months in sealed jars stored out of direct light.
And if you don’t have a food dehydrator, you can still dry and powder the turmeric by drying the cooked rhizomes in the sun or in the oven set to a very low temperature.
Powdering turmeric can also be done without the cooking process, in fact, the final product will look brighter than the cooked version. However, the cooked turmeric will store for a longer time.
Also, peeling the turmeric skin can be done prior to cooking but is a more labor intensive method.
And if you’re looking for ideas for using your turmeric powder you might like to see our recipe Easy Eggplant Chutney Recipe.
To Store Turmeric for Replanting
Remember to keep some of your turmeric harvest for replanting. Make sure the turmeric rhizomes are clean and dry and store them in boxes or trays in a cool, dark place.
They can be stored in dry sand or covered with hessian, but doing so is not necessary.
Turmeric planted outdoors can be replanted in the same spot two years running but should be rotated with another plant every third year to replenish the soil and prevent disease.
If growing in containers, the best way to get the best crop from them is to use fresh, free-draining potting soil each year, although, as long as you feed then well, you could use the same soil two years running.
Conclusion
Turmeric is an attractive edible plant that makes a wonderful addition to the vegetable garden. It’s easy to grow in the garden or even a pot or container. So why not try it in your garden?
Recommended Products:
- Chicken Manure Pellets
- Organic Potting Soil
- Seedling Heat Mat
- Grow Lights
- Food Dehydrator
- Mortar and Pestle
Related Reading:
- How To Grow Ginger: Guide To Growing Ginger At Home
- How to Grow Lemongrass: Planting and Growing Guide
- Why Is My Lemongrass Plant Dying? Causes and Solutions
- How to Grow Nasturtium in the Vegetable Garden
- Growing Bulb Onions: 20 Things You Should Know
- How to Grow Garlic: Growing and Harvesting the Best Garlic
- Why Is My Ginger Plant Dying? Causes and Solutions